HOW TO DECORATE A MANTEL ON A BUDGET
Display the story of your family in the heart of your home. Learn how to decorate a fireplace mantel on a budget and start conversations with the personal pieces placed on your mantel.
This post contains affiliate links used to help support The Bluebonnet Farmhouse. For more information, please see my disclosures here.
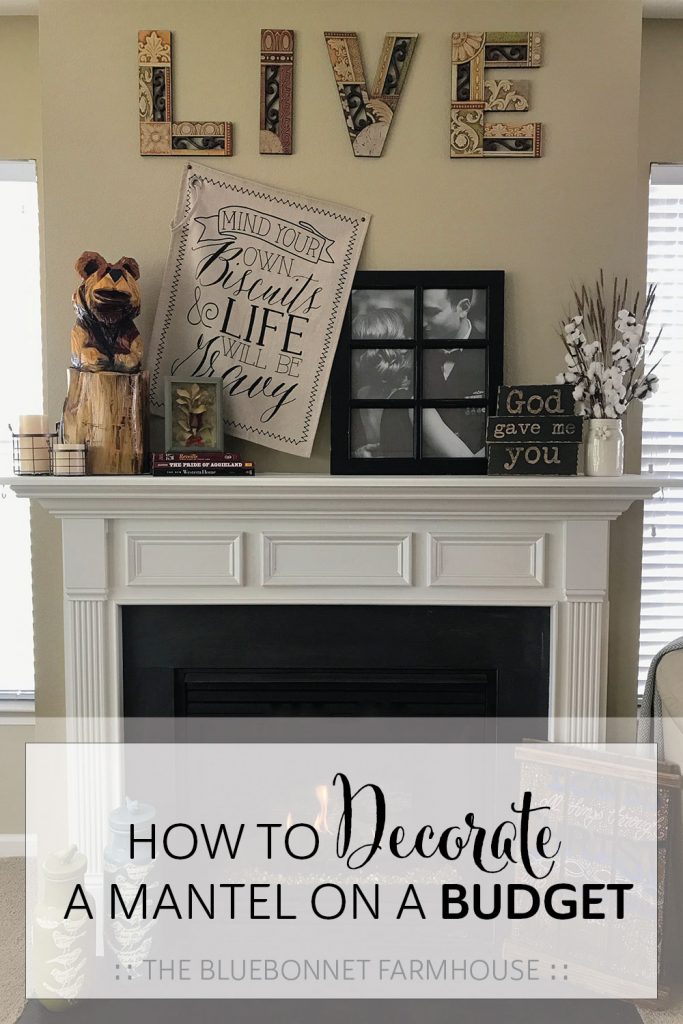
After weeks of trying to decide how to tackle this mantel, I had finally come up with a solution and in love with how it turned out! We were renting housing on base at the time and therefore could not do any permanent design work – mantel decor only.
Originally, the mantel was none other than where the television resided along with the cable box and the ever so glamorous Xbox. Not exactly the statement pieces I want to welcome guests with into our home.
We decided to change up the layout of our furniture, which meant we were able to relocate the TV and free up the fireplace mantel for a more welcoming entryway. The problem was I had no idea what to do next.
College apartments are not known for housing cozy fireplaces and now that we had a house with a fireplace, I wasn’t sure what in the world I was supposed to do with it.
At this particular time in our lives, we did not have the excess funds to go out and purchase an abundance of new decor. Instead, I chose to focus on selecting items we already had and arrange them in a way to illustrate the story of us.
To do this, we used these budget-friendly items:
- secondhand items from family
- gifts from friends
- one souvenir
- a few decorative books
- a couple of DIY projects
- a few inexpensive items we found on sale
- family photos and a couple of candles
I wanted our mantel to be decorative and inviting, but to tell a story at the same time. By the way, the mantel in our base housing was massive! We are talking at least a foot deep so we had lots of room to work with on this one. There were several items I wanted to be placed on the mantel, but the challenge was which pieces and how to arrange them.
SOUVENIRS
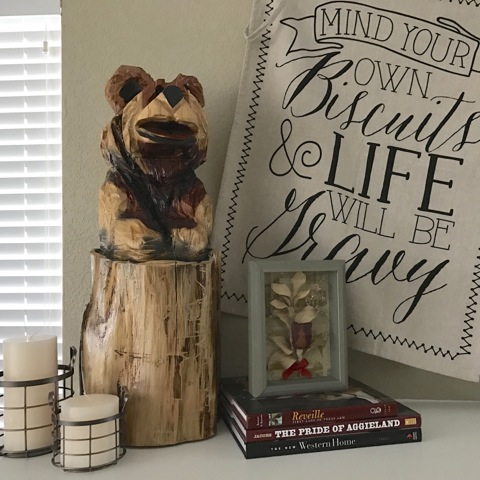
In order for the mantel to illustrate our story, I chose to include a few different pieces of conversation starters. The first and most prominent piece would probably be the chainsaw carved bear – isn’t he just too cute?! No hand tools were used in the making of this bear; he was carved entirely by chainsaw! Our chainsaw bear came from Pigeon Forge, Tennessee where lots of fun memories were made and one of our favorite vacation spots.
BOOKS
Next, I selected some decorative books to be placed beside our chainsaw bear. The maroon books not only represented our university and Aggie pride, but the color complimented our bear nicely by playing off of the red tones of the cedar. Below are the books displayed:
DIY PROJECTS
Our mantel is home to a couple different projects of mine, one of which is this preserved rose (updated post coming soon!). This particular project is dear to my heart being that it displays the first rose my husband presented to me. Placing this flower on the fireplace mantel was a must because it serves as a sweet reminder of the beginning of our life together.
FLORAL
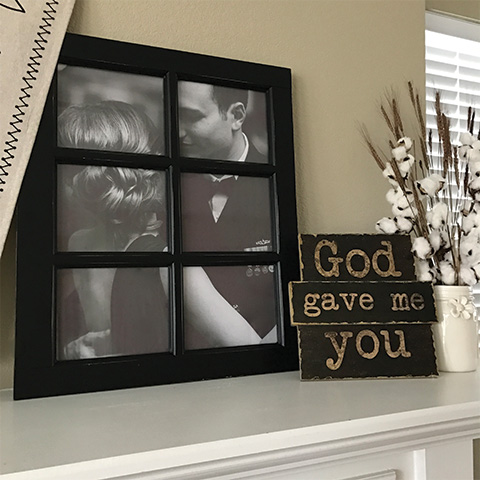
Floral arrangements are always a nice and recommended addition to any mantel. I had this mason jar vase that was a gift from my mom and decided to use it for our arrangement. Instead of purchasing new floral, I opened the my craft closet to find some dried floral that was left over from these chalkboard wine bottles.
I decided on a cotton arrangement with brown dried wheat accents. I love dried floral because it creates a natural, neutral, and rustic look. All I had to do was trim down the stems of the wheat and arrange as desired!
TIP: Use the excess stem pieces as filler in the bottom of the vase to help keep your arrangement in place.
Another great option would be to use faux or live greenery. Greenery gives a natural pop of color and brings the peaceful look of nature indoors.
PHOTOS
Lastly, a cherished photo is the perfect addition to complete your story. The other DIY project here, and one of my favorites, is the window picture frame (updated post coming soon!). I am beyond thankful for the photographers who captured this photo of us while we were dancing at our close friends’ wedding! We had no idea they snapped this photo until the bride shared it with us later, but I am so happy they did, as it is one of my absolute favorite pictures of us. A picture really does say a thousand words, and this one says everything.
RELATED POSTS:
- DIY Dried Floral Shadow Box
- DIY Memories Shadow Box
- DIY Chalkboard Wine Bottles
- How to Print a Photo for a Window Frame
- Rustic Farmhouse Decor with Budget Decorating Tips
Thanks for following along! Happy decorating!


