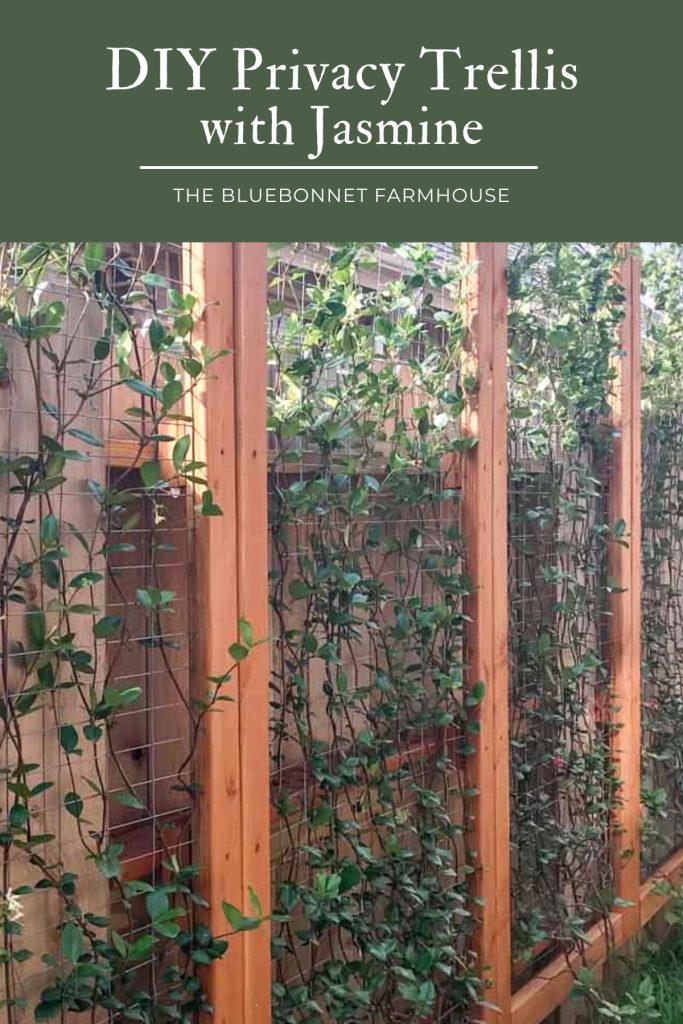
DIY Privacy Trellis with Jasmine
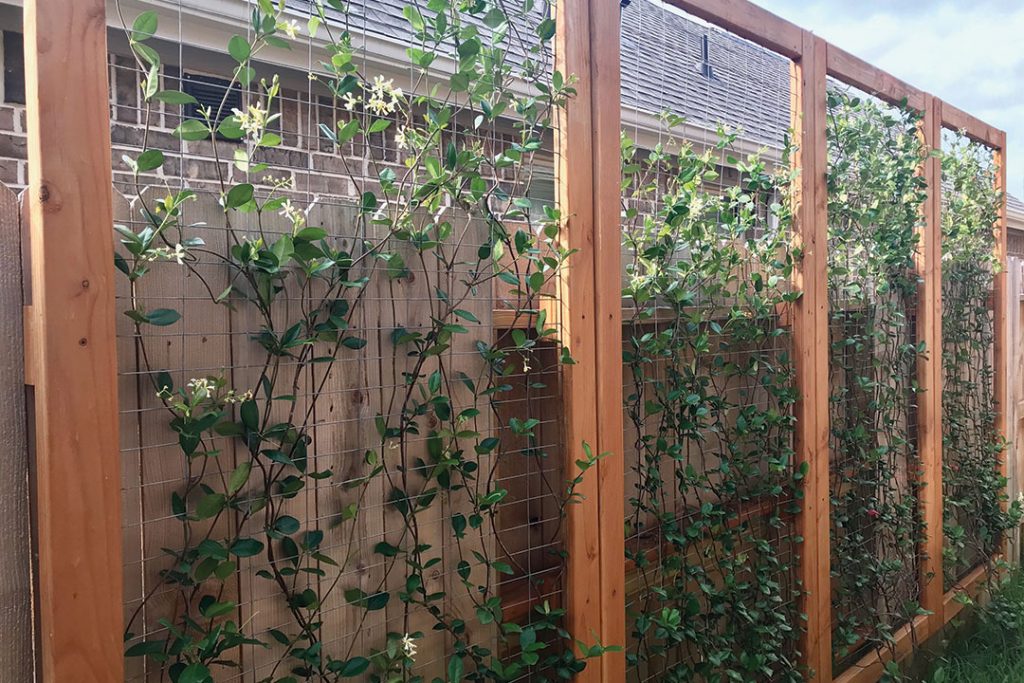
This DIY privacy trellis is the perfect solution for how to create privacy in your backyard. Welcome spring with trellises full of beautiful white flowers and wonderfully scented jasmine!
Shortly after moving into our first home, we wanted to come up with a solution for how to add both privacy and a beautiful view outside of our dining room windows.
I have always loved the look of vines trailing up the side of an old stone wall and decided to take inspiration from that to create this trellised wall.
Now, rather than spending family time gathered around the kitchen table gazing upon a wood fence and the neighbors windows, we get to enjoy the bursting fragrant blooms of these jasmine trellises.
We also enjoy all of the hummingbirds and butterflies outside our windows as a result of the new addition!
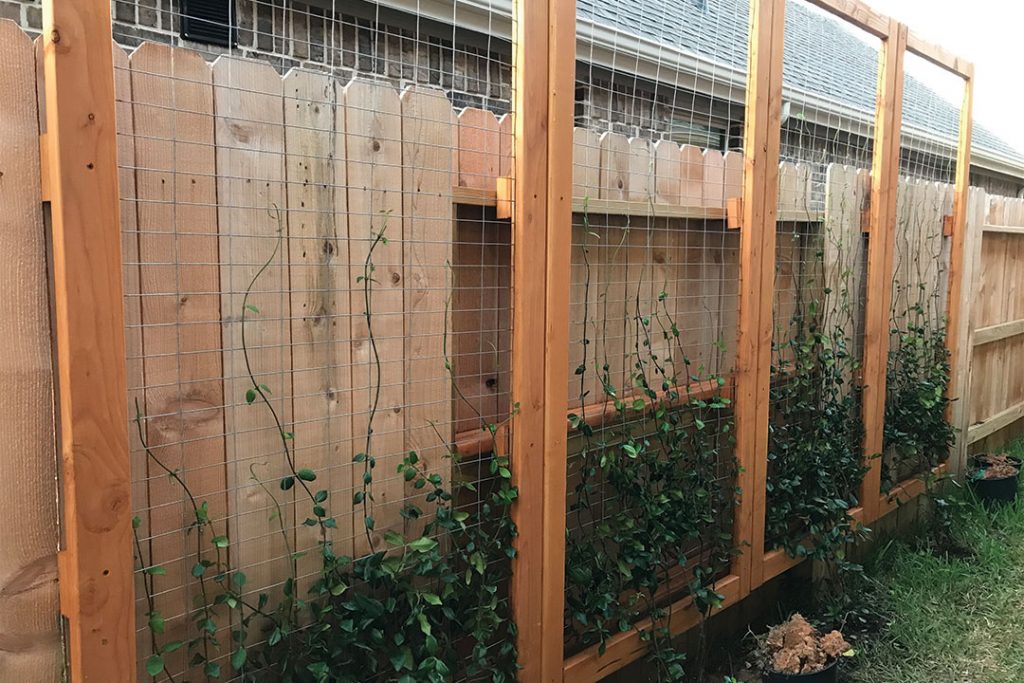
How to Create Privacy in Your Backyard
This is a great springtime project to enjoy the beautiful weather and utilize optimum growing season.
Granted we did not build and install these in the cool springtime breeze, instead we chose the smoldering heat of August.
To top it off, we built not one, not two, but thirteen trellises. Yes, you read that right. Long story short, both of my grandmas caught wind of our little project.
So we set to work and 4+ weekends later – after juggling a busy toddler, sweating out every toxin in our body, and ultimately dehydration – all thirteen trellises were designed, assembled, and installed. It was well worth it because we are in love with the end result!
DIY Privacy Trellis FAQ
What type of wood is best to use for outdoor trellises?
My preferred wood for outdoor trellises would be cedar due its longevity and natural ability to deter pests. However, we were not interested in the expense of cedar for this project and opted for untreated 2x4s with an outdoor stain and sealant.
What plants work best for privacy trellises?
Any vining plants will work for adding privacy to your trellises. Some personal favorites are jasmine, roses, honeysuckle, morning glory, mandevilla, English ivy, and pothos.
How do I install the trellises to the fence?
You can choose to float the trellises a couple of inches off of the fence like we did or attach them directly to the fence. Refer to the tutorial below for installation instructions.
Variations for a DIY Privacy Trellis:
- If you don’t have a Kreg jig, simply use mitered cuts and adjust the lengths of your board cuts to two 3’7” pieces and two 7’0” pieces.
- Add a header to the trellis for a more decorative finish. Refer to the instructions under Step 04.
- Use 4 x 4 posts or extend the length of the trellis sides to create in-ground posts for use in gardens for vining vegetable crops.
- For a slightly more finished look, try using a router or table saw to create grooves on the inner portion of the frame for the wire to slide into rather than attaching with staples.
- Adjust the lengths of your board cuts to two 2’10.5″ pieces and two 7’0” pieces. We would recommend the routed grooves to be 3/4″ deep and 1/8″-3/16″ wide. Route the line 1/3 away from what will be the back of the trellis.
- This was a design change we thought of after having built our trellises. Therefore we have not personally tried this route and cannot guarantee the end result, but thought it would be a good idea to share nonetheless.
This post contains affiliate links. View my full disclosure here.
Tools You May Need:
- Miter saw or circular saw
- Tape measure
- Drill
- Kreg jig pocket hole system
- Speed square
- Wire cutters
- Manual staple gun
- Clamps
- Level
Supplies:
Listed below is the supplies needed to build one trellis.
- 3 – 2 x 4 x 8 wood stud
- 3′ wide welded wire fence – cut to 6′ 6″ length.
- 2 1/2” Kreg pocket hole screws – indoor/outdoor
- 3” deck screws – this color works perfect with the stain we used.
- 1/2″ heavy duty staples
- Staple gun
- Outdoor stain
- Paint pan
- Stain brush
- 1 – 5/8 x 5 1/2 x 8 cedar fence picket
- Not needed if you do not have alternating fence panels – see installation below for more info.
How to Build a DIY Privacy Trellis
Build the Trellis Frame
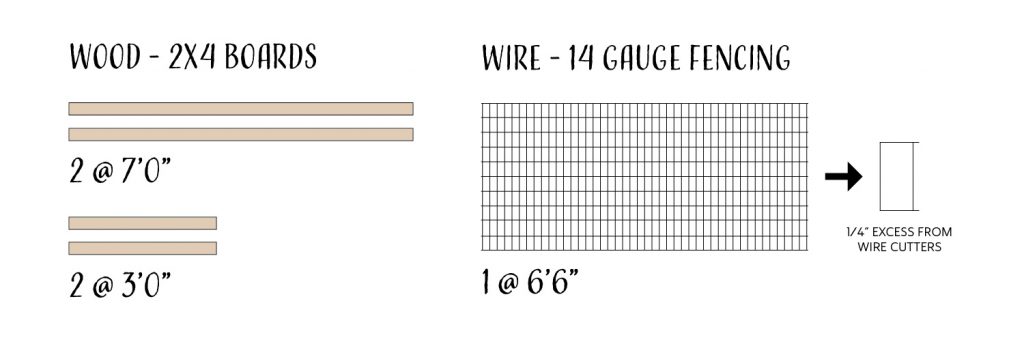
Using the 2x4s, cut two 3’ pieces and two 7’0” pieces.
Lay out the wire and cut to 6’6” in length. Cut as close to the upper and lower width running wire as possible with the wire cutters – about 1/4”. You will have excess wire compared to the frames opening, this will be explained later.
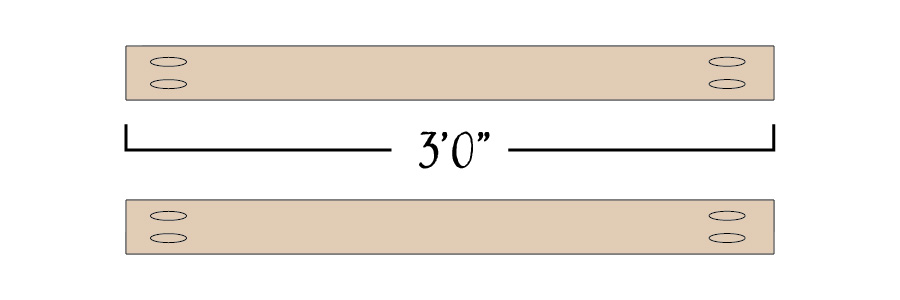
Using the Kreg Jig, drill four pocket holes on the back of each 3’ piece. Two pocket holes on each end.
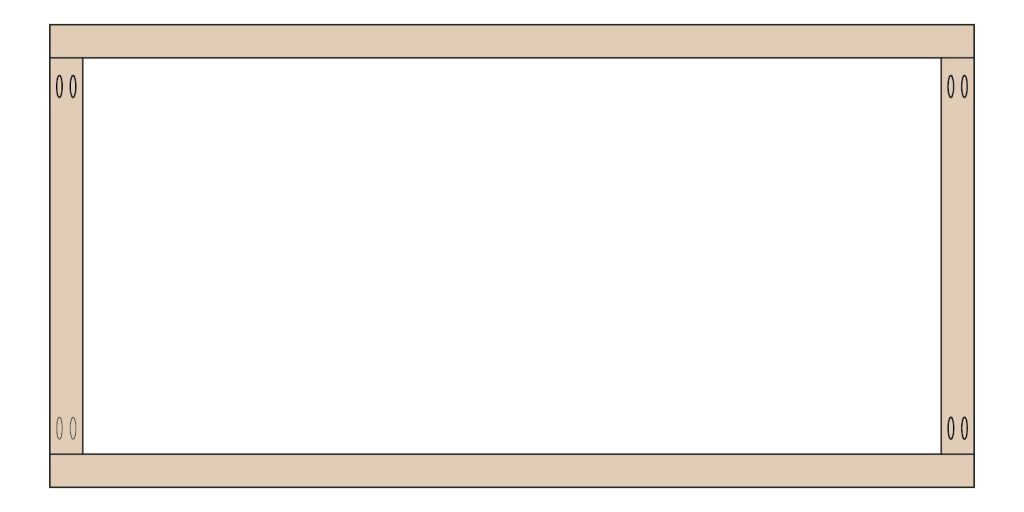
Lay the wood pieces in order on a flat surface.
Use a speed square to ensure 90 degree angles and drill the 2 1/2″ Kreg screws into the pocket holes.
With the wood frame laying flat, roll out the wire and clamp into place along the inner portion of the wood frame.
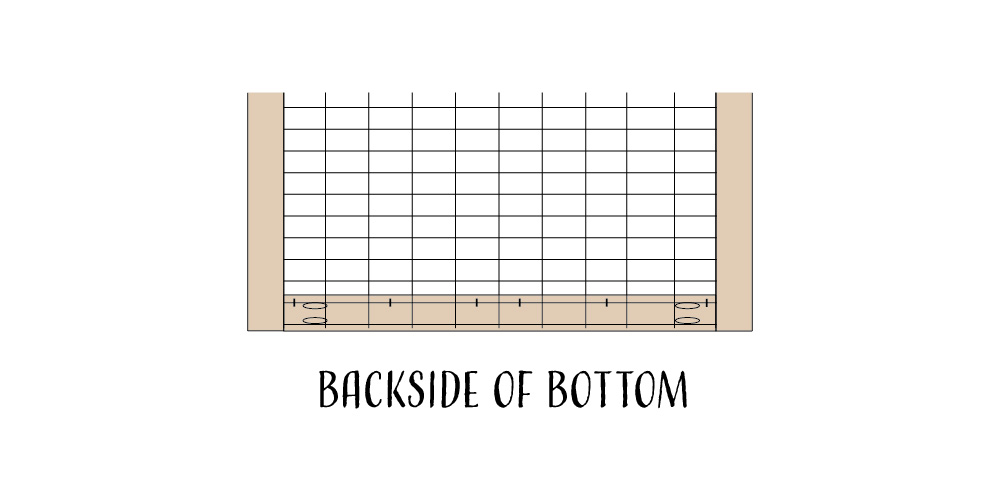
The wire will be longer than the frames opening. Place the excess wire at the bottom on the back of the trellis frame.
The trellis frame dimensions were chosen for the wire to be stapled along the inner portion of the frame rather than along the back portion. This placement makes the trellis as aesthetically pleasing as possible for both ours and the neighbors side of the trellis. It also allows for easier access for any maintenance needing to be made later if necessary – replacing staples, etc.
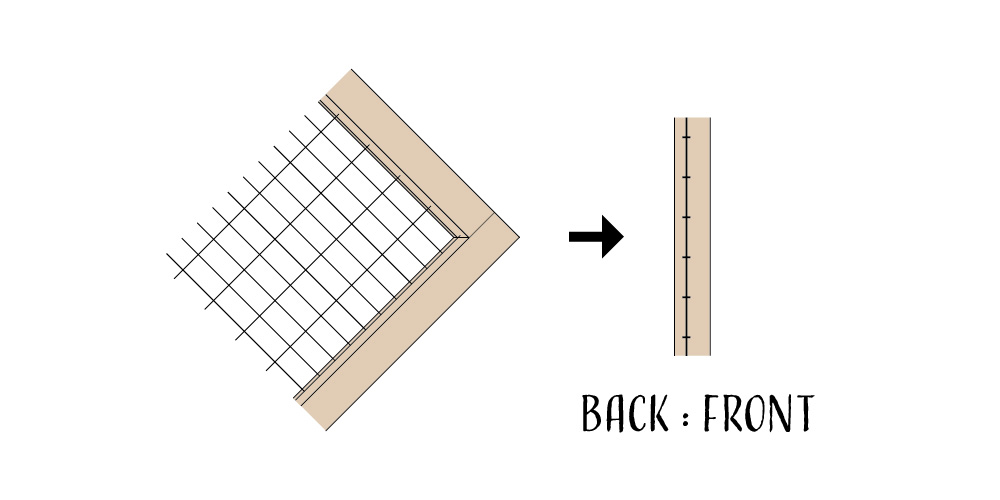
Once clamped into place, lay the frame propped up on its side (lengthwise) and staple the wire to the wood with the staple gun – stapling down every 2 or 3 spaces.
We stapled the wire 1/3 away from what will be the back of the trellis rather than straight down the middle as shown above.
Once the top and sides are stapled, simply staple the excess wire along the back of the bottom 2×4 as shown below. This is to accomplish a clean finish with no loose ends of wire at the bottom of the frame that could poke little ones fingers.
We did not do this at the top in order to keep a clean appearance for our neighbors side, but were not worried about it on the bottom since it faces the fence.
After assembly, finish the trellis with outdoor stain and sealant.
Optional Decorative Header
You will need two 1 x 6 x 6 wood boards and a 45 degree triangle
My grandma’s neighbor has some similar trellises that were actually the inspiration for this entire project! She chose to do the decorative header similar to her neighbors for her two stand alone trellises.
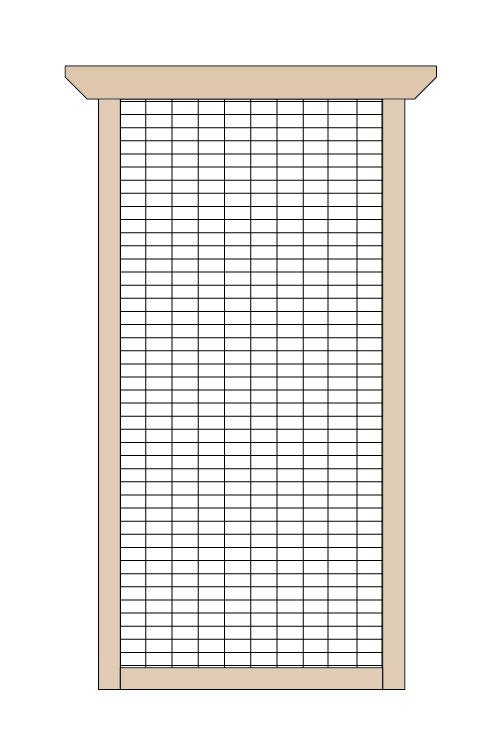
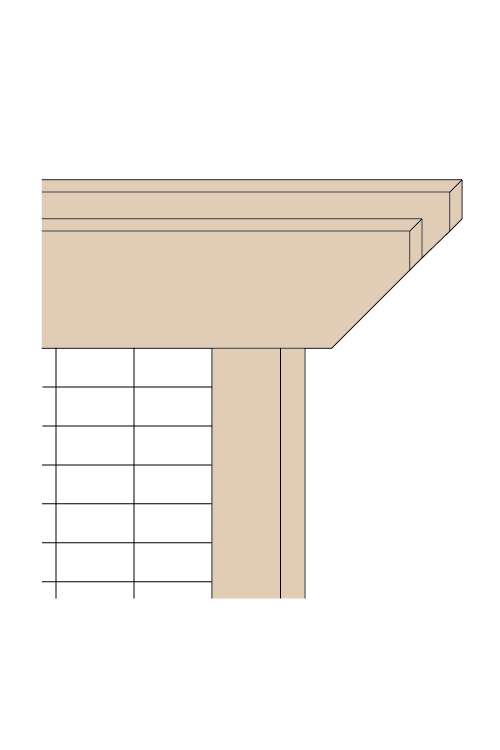
Using the 1x6s, cut two 4’6″ pieces. These two pieces will be used to sandwich the top 2×4 of the trellis.
On each end, measure down from the top 2” and draw a 45 degree angle line from that point to the bottom of the 1×6 with a 45 degree triangle.
Cut along the angled line.
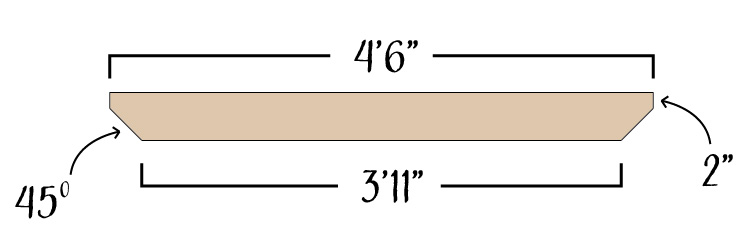
With your trellis laying face down, lay one decorative header under the upper 2×4 and the other on the top. Center the two pieces with the trellis and align the bottom of the header pieces with the bottom of the top 2×4.
We used scrap wood blocks as a guide to make sure the two header pieces are even with each other.

Use 3” deck screws to attach the two pieces to the trellis frame. Do not drill the screws below the wood surface level – this will result in the screws poking through the front header.
Install Trellis onto a Privacy Fence
There are two different ways in which you can attach the trellises to the fence. You can use 3″ screws and attach the trellises directly onto the fence, or you can float them from your fence.
We chose to float ours from the fence and absolutely love how they turned out! Not to mention, that extra space makes it easier to weave the plant vines through the trellis.
This installation tutorial is for floating trellises. If you choose not to float the trellises, the same concepts apply just without the 4″ blocks of 2x4s.
Make sure your fence is in good condition before installing trellises.
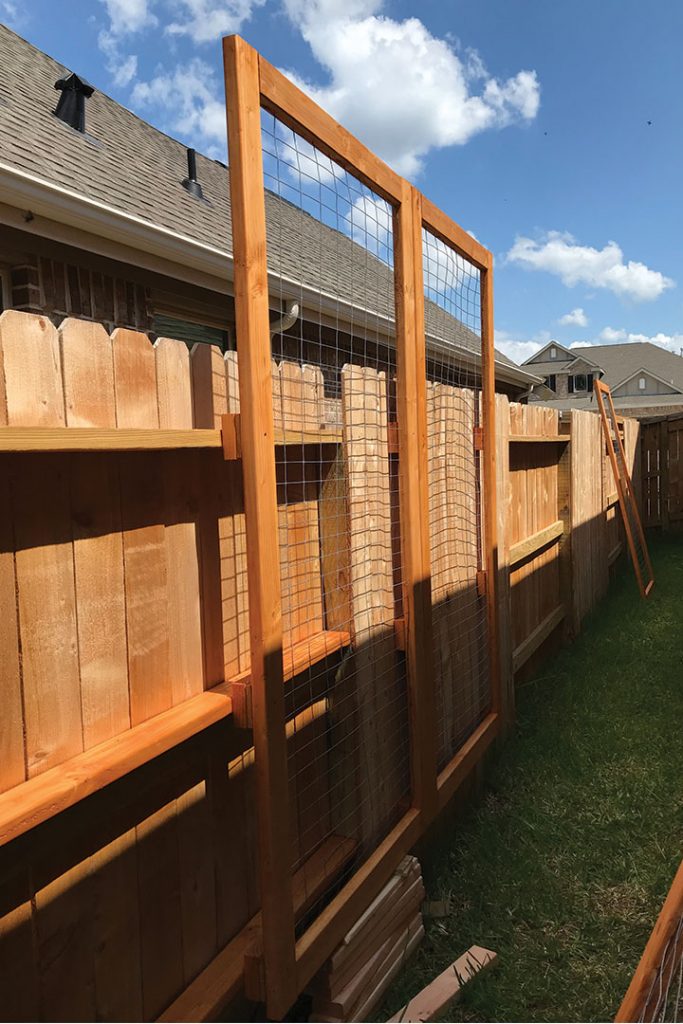
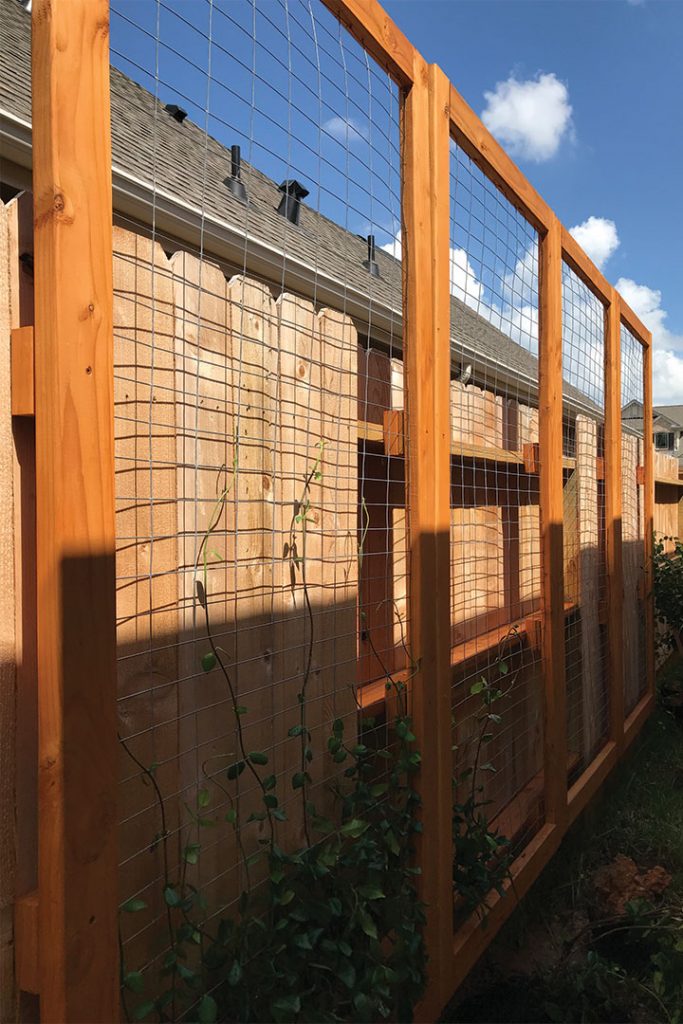
Floating trellises installed on alternating fence panels.
First things first, you need to establish where the trellis is to be hung and if that portion of the fence has alternating panels, visible framework, or flush pickets.
Below are the cuts needed for if the trellis is to be hung on both sides of the alternating fence panels – such as the kind of fence line found between neighboring homes seen above.
Any pieces used for installation will need to be finished, same as the trellis, with outdoor stain and sealant.

Each trellis will need six 2×4 blocks in order to float the trellis from the fence.
The 4″ blocks cut of fence pickets are not needed if the fence panels do not alternate. They are only needed when hanging one or more trellises on both sides of alternating fence panels and accounting for the thickness of the existing fence pickets.
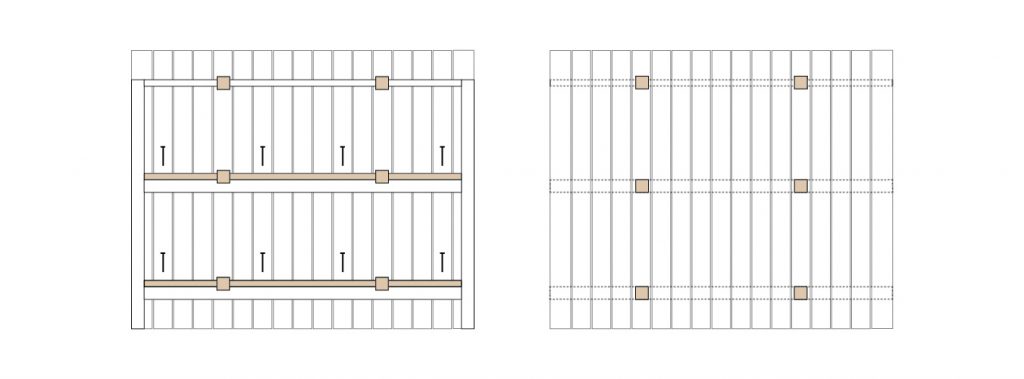
Exposed Frame + Flush Pickets = Alternating Panels
As illustrated above, the exposed frame requires the installation of 2x4s cut to the length of the fence frame and installed with the 3.5″ side parallel to the ground. This allows for all hanging surfaces to be flush with the 4×4 posts of the fence frame. We used four 3″ deck screws to attach each 2×4 to the fence frame.
If placing trellises over alternating fence panels, use only the 2×4 blocks on the flush picket side, and both the 2×4 blocks and the fence picket blocks on the framework side. This will account for the thickness of the existing fence pickets; therefore, creating a flush profile to keep the trellises in line with one another and the fence itself.
If working with flush pickets only, use 3″ deck screws to attach the 2×4 blocks directly onto the pickets in line with the framework behind as shown above. Make sure the screws are going through the pickets and into the horizontal frame behind to securely attach the trellis.
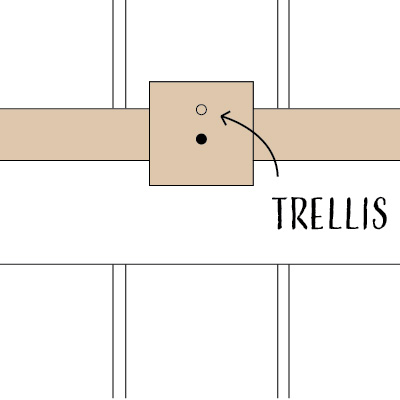
Use a level on the trellis when determining placement and during installation.
After marking where the blocks are needed, center the blocks with the fence frame and drill a 3″ deck screw into the center of the each block. Place the trellis in front of the installed blocks and drill a 3″ deck screw in slightly above or below each center screw.
There you have it! Your trellis is built, installed, and ready to come to life with plants!

After only less than a year, our jasmine more than doubled in height! The plants have reached the top of each trellis and are currently being woven throughout the trellis to thicken the foliage.
We eagerly look forward to the jasmine filling in the entire space available on the trellis and having a solid wall of greenery!
“I am the vine; you are the branches. If you remain in me and I in you, you will bear much fruit; apart from me you can do nothing.”
JOHN 15:5 (NIV)

More Farmhouse Builds and Gardening:
Find more handmade home projects here.
If you enjoyed this DIY project, let me know in the comments below! Tag me on social media to share your trellises!
Pin it for Later!


