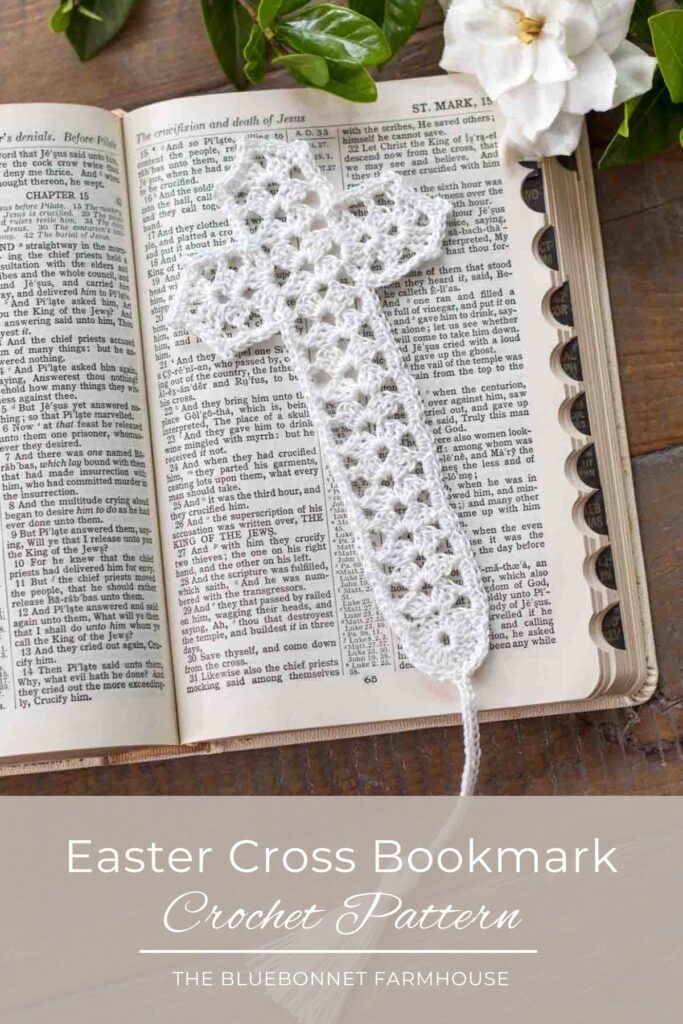
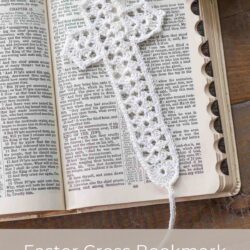
Easter Cross Bookmark – Crochet Pattern
This post may contain affiliate links. Please see our disclosure policy.
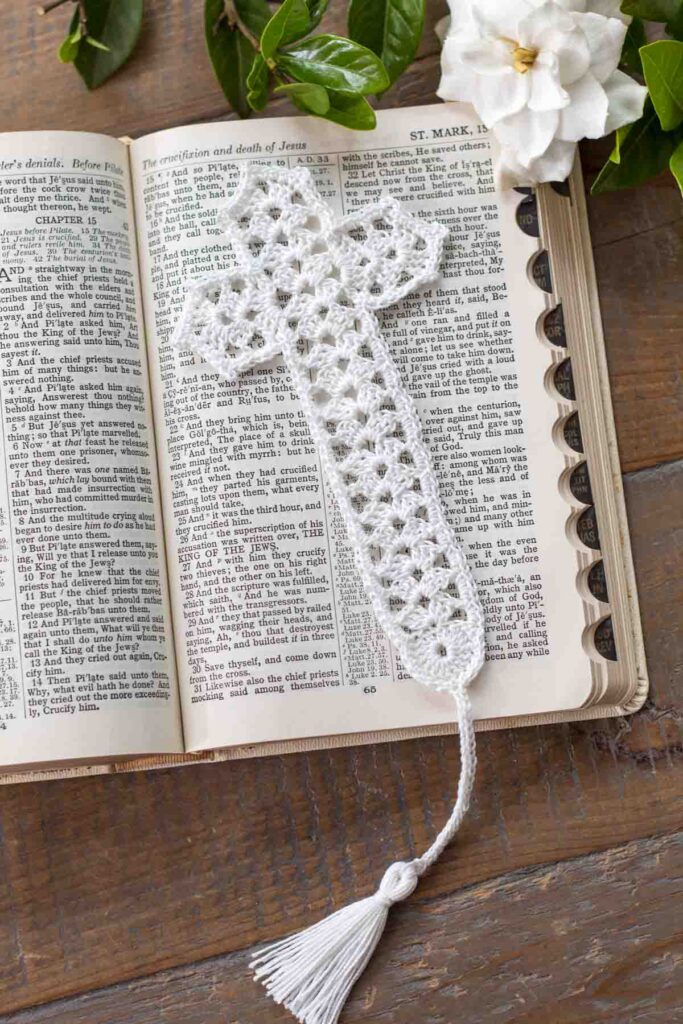
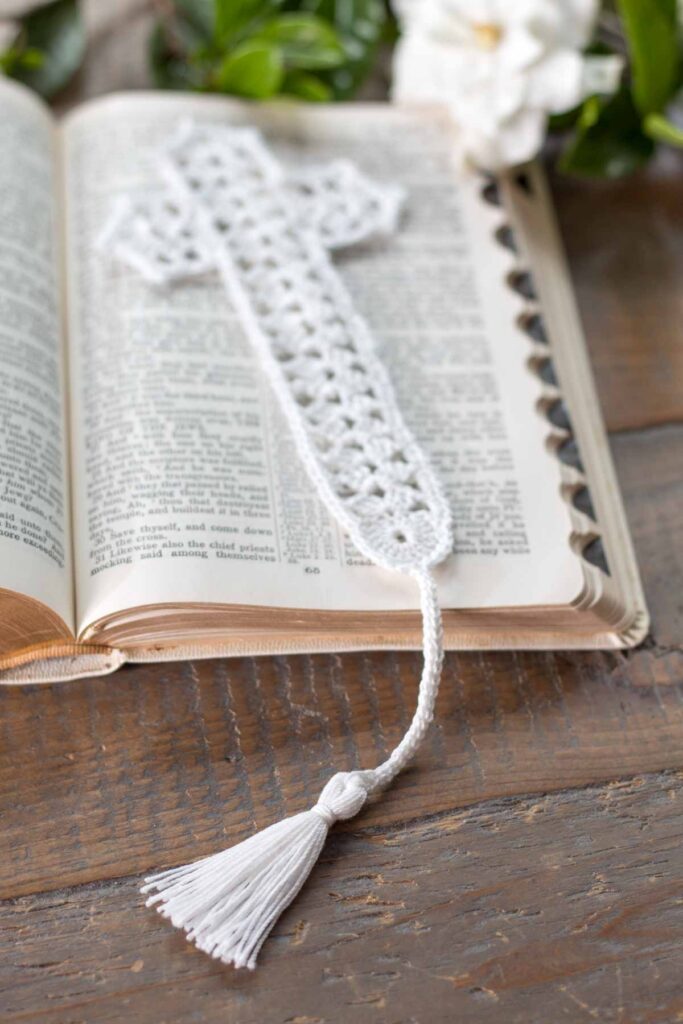
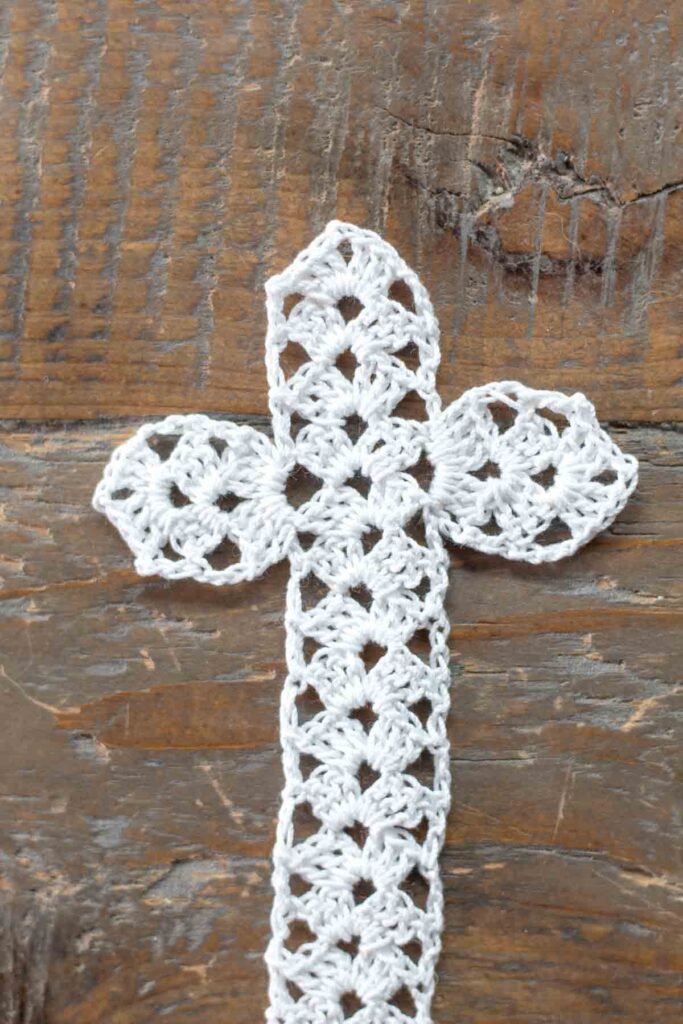
Learn how to make an Easter cross bookmark with this simple to follow free crochet pattern. This beginner-friendly project makes for a beautiful handmade gift and sweet reminder of Christ’s sacrifice for us.
Easter is all about the resurrection of Christ and the sacrifice He made for us on the cross so that we may be saved through Him. There is no better reminder of this than through the symbol of the cross.
I love gifting these simple and sweet crochet cross bookmarks as a way to spread Christ’s love and message to others with every turn of a page.
…but the men said to them, “Why do you look for the living among the dead? He is not here; he has risen!”
Luke 24:5-6
The inspiration for this cross bookmark pattern goes all the way back to my grade school years. The mother of my 3rd grade teacher made one of these bookmarks for each of her daughter’s students and I have kept mine ever since.
Knowing the value and sentiment this handmade gift had on me to hold onto after all these years made me want to continue to share it with others as my teacher had with each of us.
After lots of counting stitches, I now have a beautiful cross crochet pattern to share with you so that I may carry on the tradition my teacher’s mother started all those years ago.

Tips
- I prefer to use cotton crochet thread, or lace weight yarn, for the purpose of a bookmark as it makes for a thinner profile.
- Starch the finished bookmark for a stiffer cross.
- Makes for a wonderful Easter gift or handmade items for: baptisms or christenings, sponsor children, Operation Christmas Child shoeboxes, teachers, craft fairs or fundraisers, and so many more.
- Mix and match with my heirloom star and cross bookmark for an assortment of beautiful vintage bookmarks.
- This is the perfect crochet project for beginners with basic stitches and quick to complete.
Variations of this Project
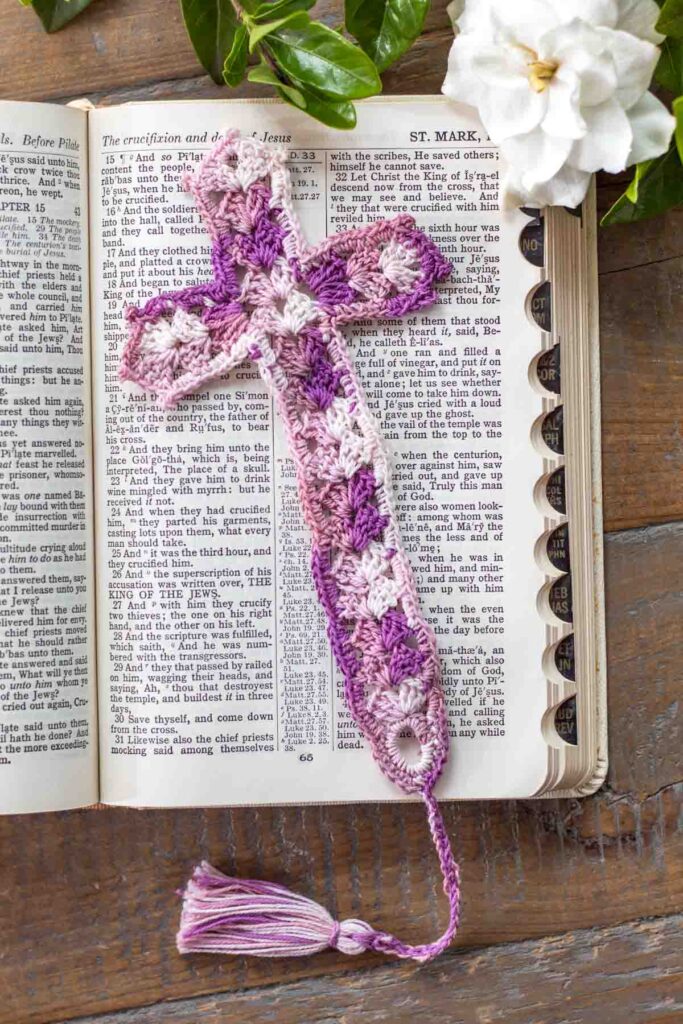
- Trim the cross or tassel in a different color.
- Increase or decrease the length of the cross or tail for a variety of sizes.
- Use larger weight yarn for a thicker bookmark, decor, etc.
- Add some beads or a loop at the top for decor.
Supplies
2.5 mm crochet hook
Size 10 crochet thread – also known as lace weight yarn.
Yarn needle – to weave in loose ends
Cardboard – 2 inch square for tassel
Scissors
Finished Size
The finished size of this crochet bookmark is 11 inches x 3.5 inches.
The cross measures 6.5 inches and the tail with tassel measures 4.5 inches.
Gauge
12 rows = 4 inches in double crochet
Stitches & Abbreviations
st(s) – stitch(es)
ch – chain
sl st – slip stitch
sc – single crochet
dc – double crochet
sc2tog – single crochet 2 together
Single Crochet 2 Together (sc2tog)
Used to decrease the number of stitches, and in turn the bulk, in the corners of the cross.
Insert hook into the next st. Yarn over and pull up a loop (2 loops on hook). Insert hook into the next st. Yarn over and pull up a loop (3 loops on hook). Yarn over and pull through all 3 loops on your hook.
Free Printable PDF Pattern
How to Make an Easter Cross Bookmark – Crochet Pattern
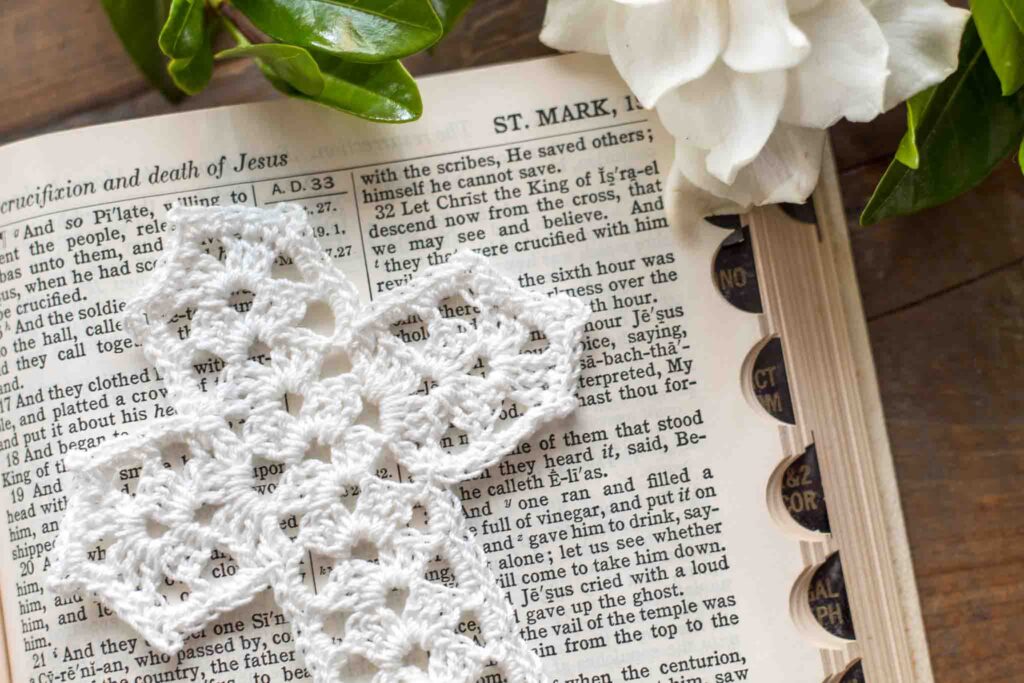
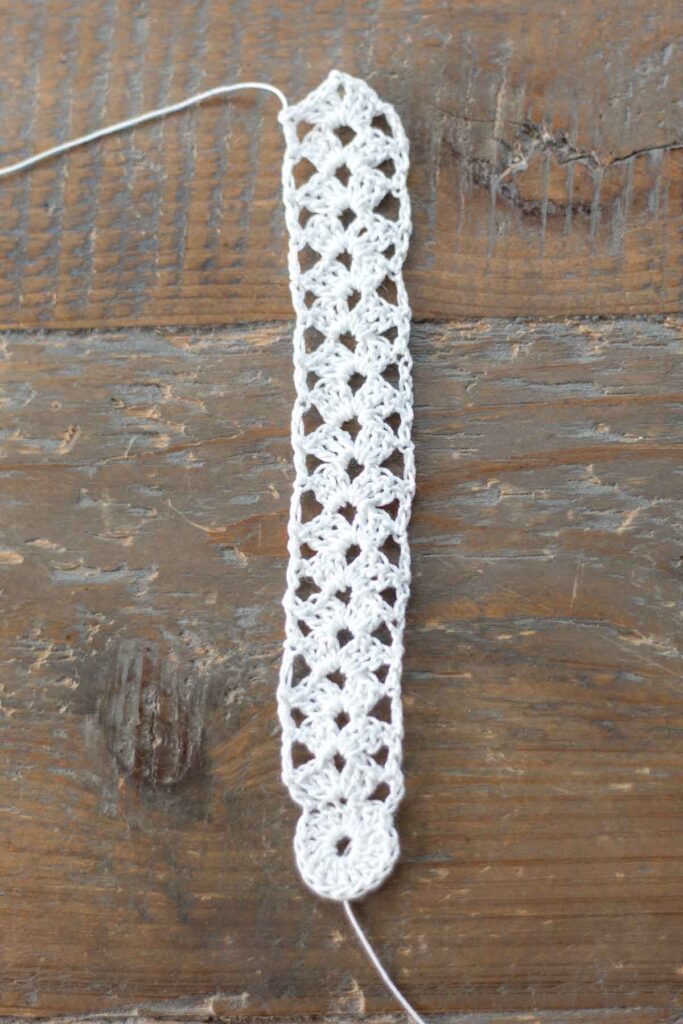
Body of the Cross
Loop:
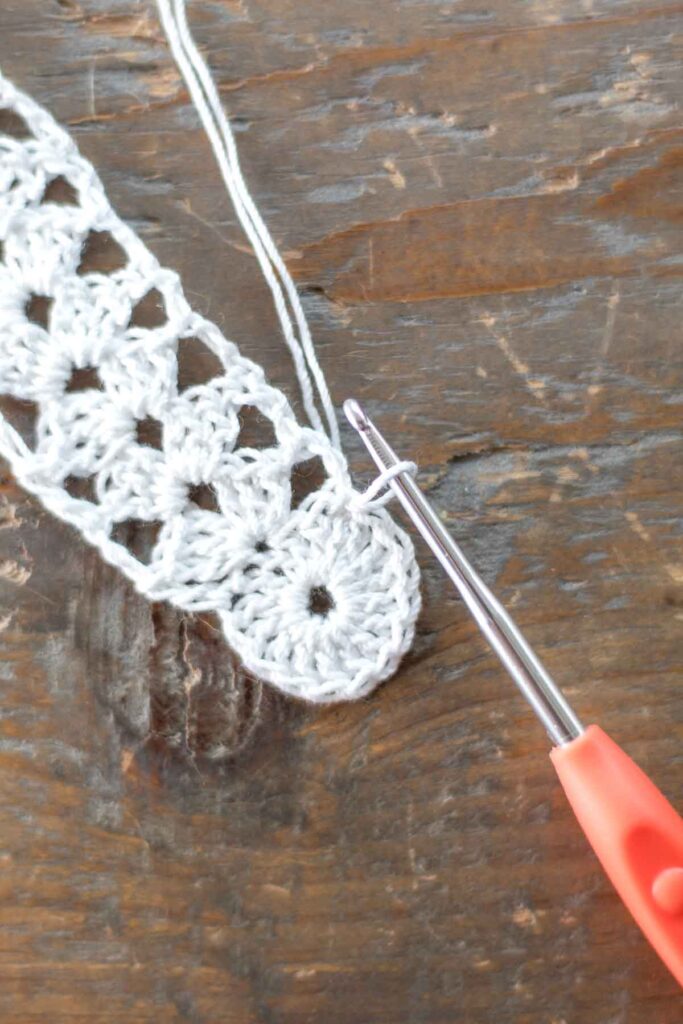
Begin with a magic ring, ch 3, 16 dc in center of loop, sl st in top of ch 3 to close round. (17 sts)
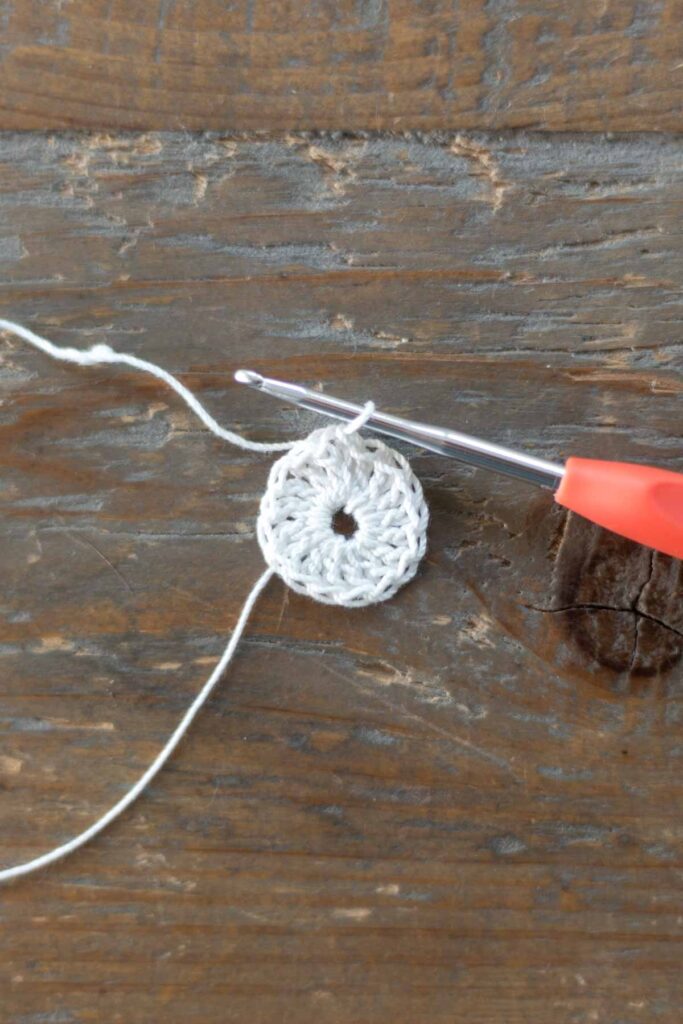
Row 1:
Ch 3, skip st, 3 dc in next st, ch 2, 3 dc in same st, skip st, dc in next st. Turn.
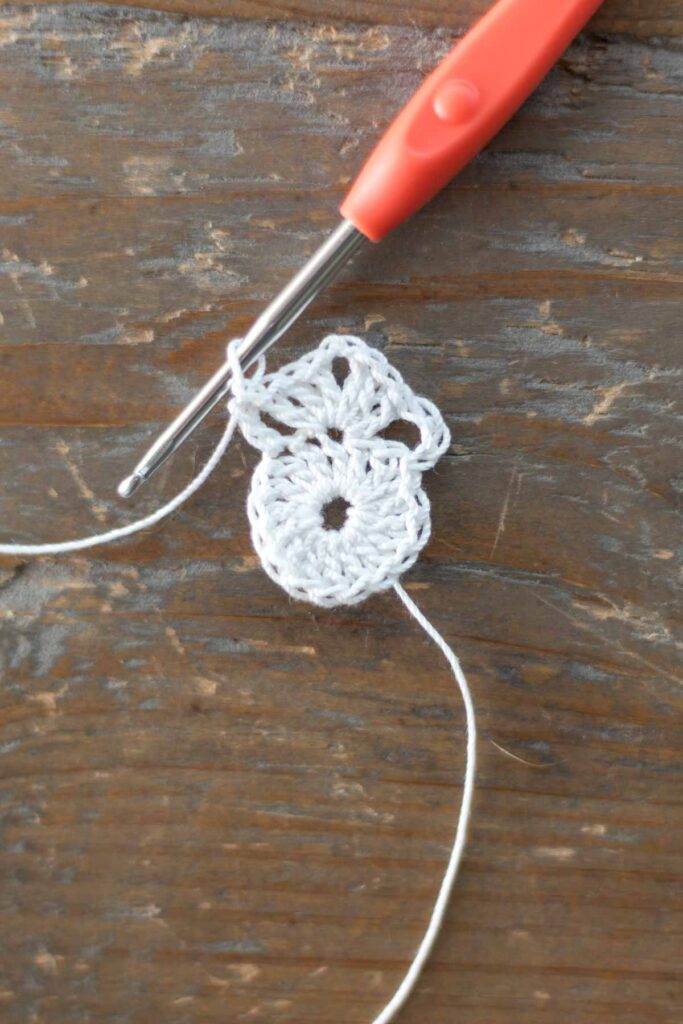
Rows 2 – 17:
Ch 3, 3 dc in ch 2 space, ch 2, 3 dc in the same ch 2 space, dc in top of ch 3. Turn and repeat.
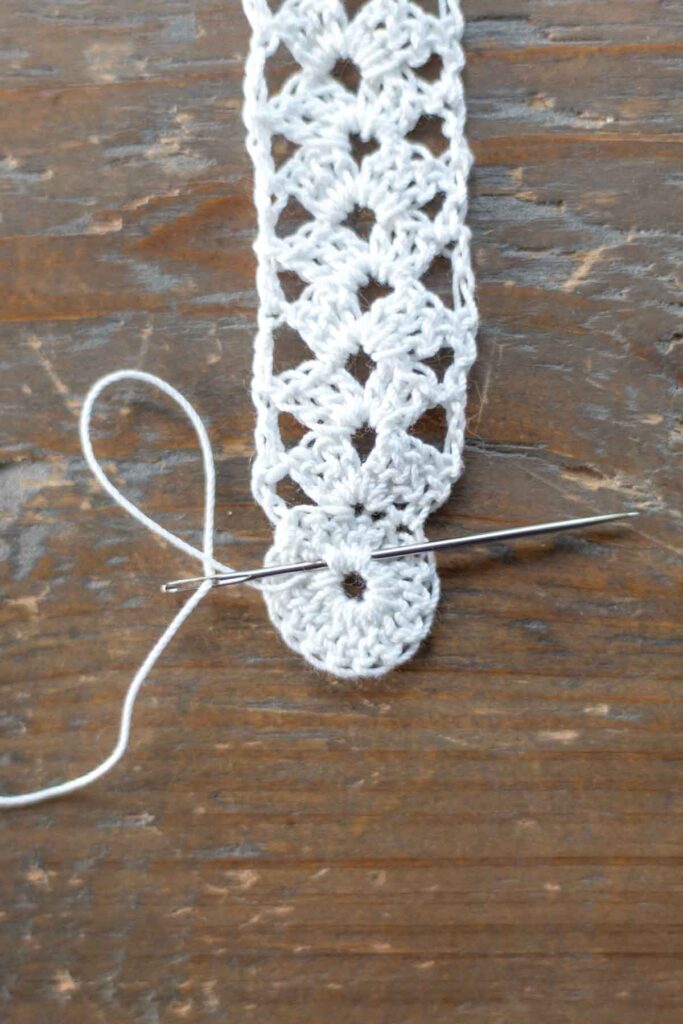
After all rows are complete, or desired length is reached, tie off and weave in loose ends.
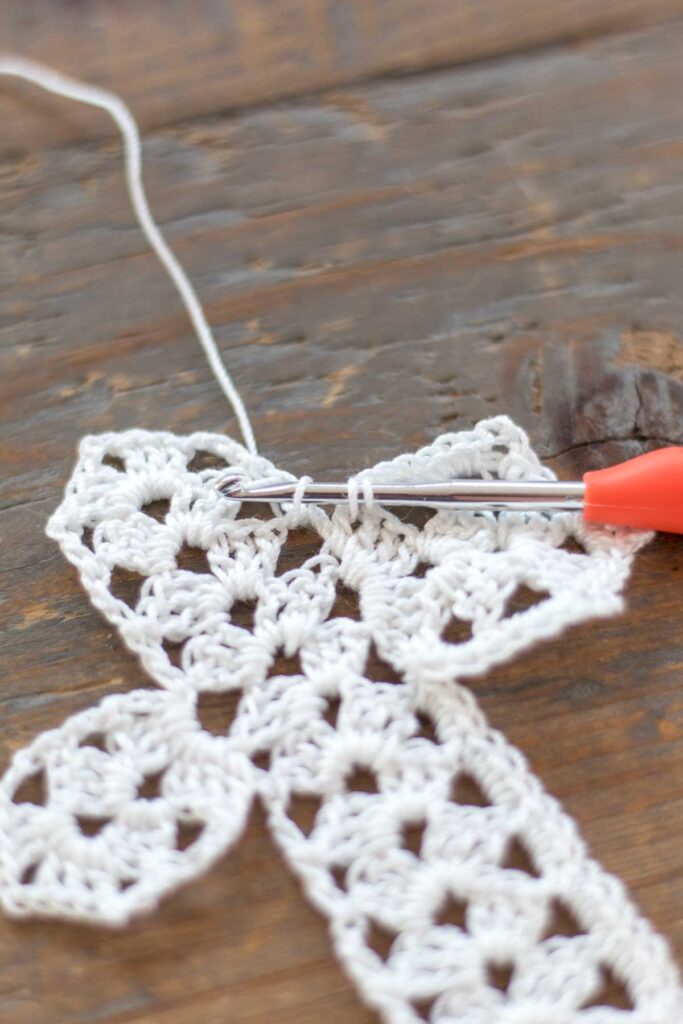
Right Arm of the Cross
Row 1:
With a new strand of yarn, pull up a loop in the top of ch 3 of row 13.
Ch 3, 3 dc in right most dc space of row 14, ch 2, 3 dc in the same dc space, dc in top of dc of row 14. Turn.
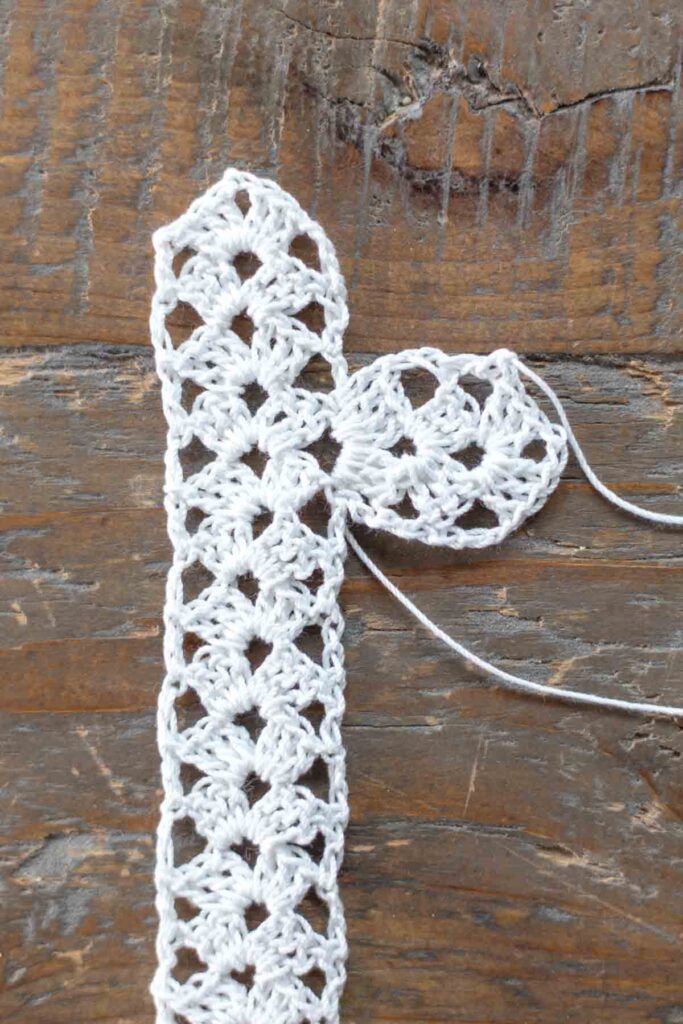
Rows 2 – 3:
Ch 3, 3 dc in ch 2 space, ch 2, 3 dc in the same ch 2 space, dc in top of ch 3. Turn and repeat.
After all rows are complete, tie off and weave in loose ends.
Left Arm of the Cross
Row 1:
With a new strand of yarn, pull up a loop in the top of ch 3 of row 14.
Ch 3, 3 dc in ch 3 space of row 14, ch 2, 3 dc in the same ch 3 space, dc in top of left most dc of row 13. Turn.
Rows 2 – 3:
Ch 3, 3 dc in ch 2 space, ch 2, 3 dc in the same ch 2 space, dc in top of ch 3. Turn and repeat.
After all rows are complete, tie off and weave in loose ends.
Tassel
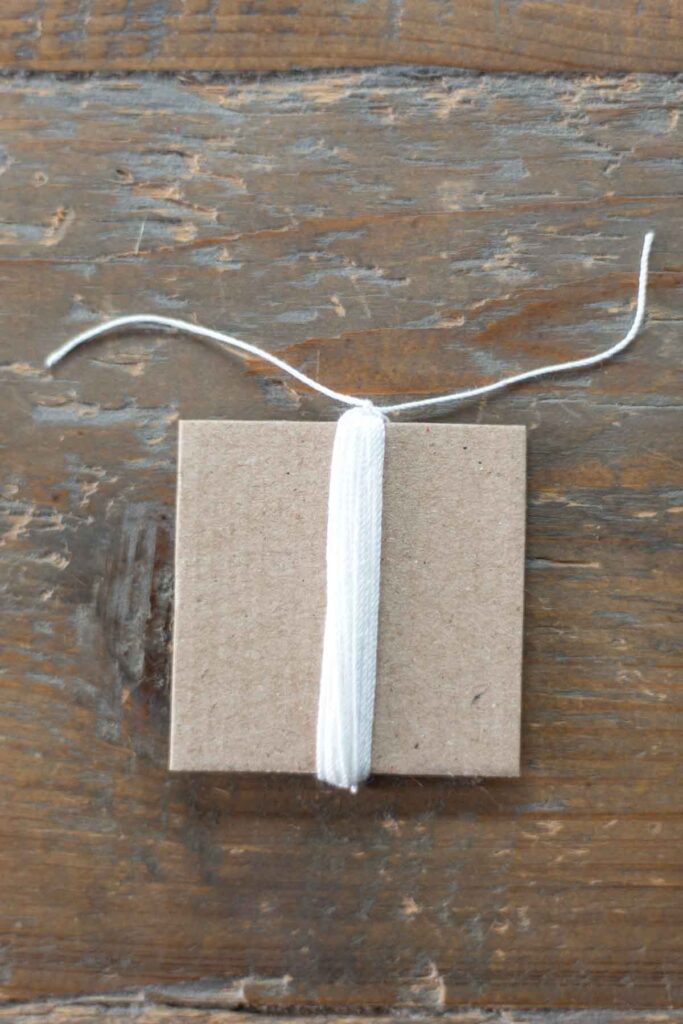
Cut a piece of cardboard into a 2 inch x 2 inch square.
Wrap crochet thread around the card 25 times.
Cut a 6 inch piece of thread and insert into the top fold of the tassel. Tightly tie a knot at the top to fasten the tassel into place. Hide the ends by weaving them down through the center of the tassel.
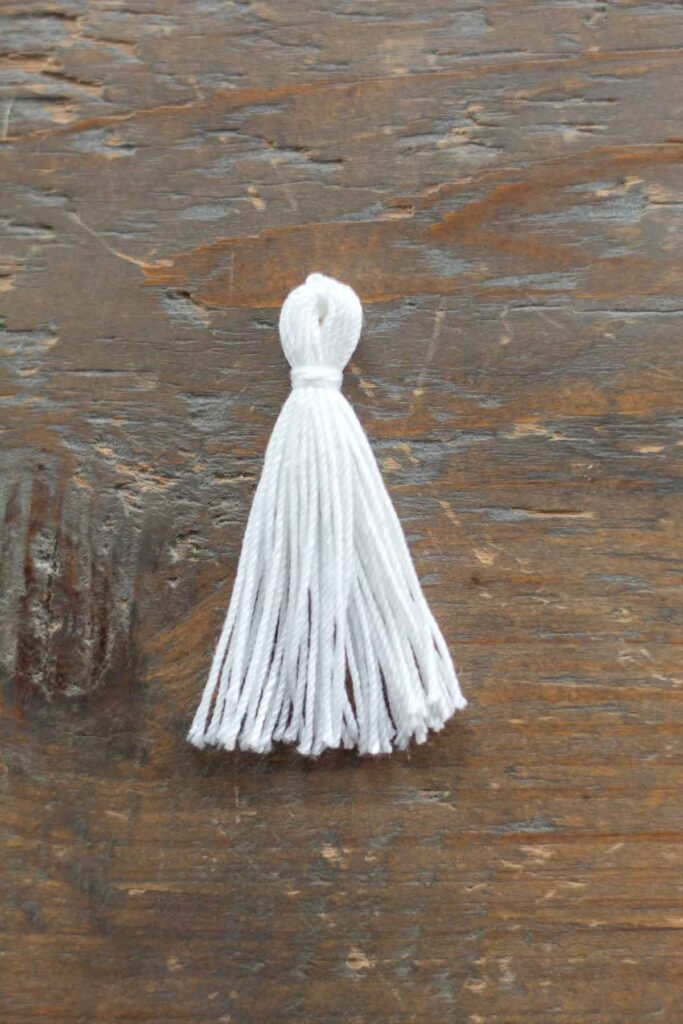
Slide the tassel off the cardboard and cut the thread at the bottom fold.
Cut another 6 inch piece of thread and wrap around the tassel strands anywhere from 1/4 to 1/2 inch down from the top. Wrap around 3 times and tightly tie a knot to secure. Hide the ends by weaving them down through the center of the tassel.
Trim any loose ends to desired length of tassel.
Trim
Pull up a loop on the first stitch of the round (stitch just before the rows begin).
Ch 1, sc in same st, 3 dc in next 12 spaces.
Sc2tog at corner spaces, 3 dc in next 2 spaces, ch 3, sc in next 3 sts, 2 sc in ch 2 space, ch 3, 2 sc in same ch 2 space, sc in next 3 sts, ch 3, 3 dc in next 2 spaces. Repeat for next two cross arms.
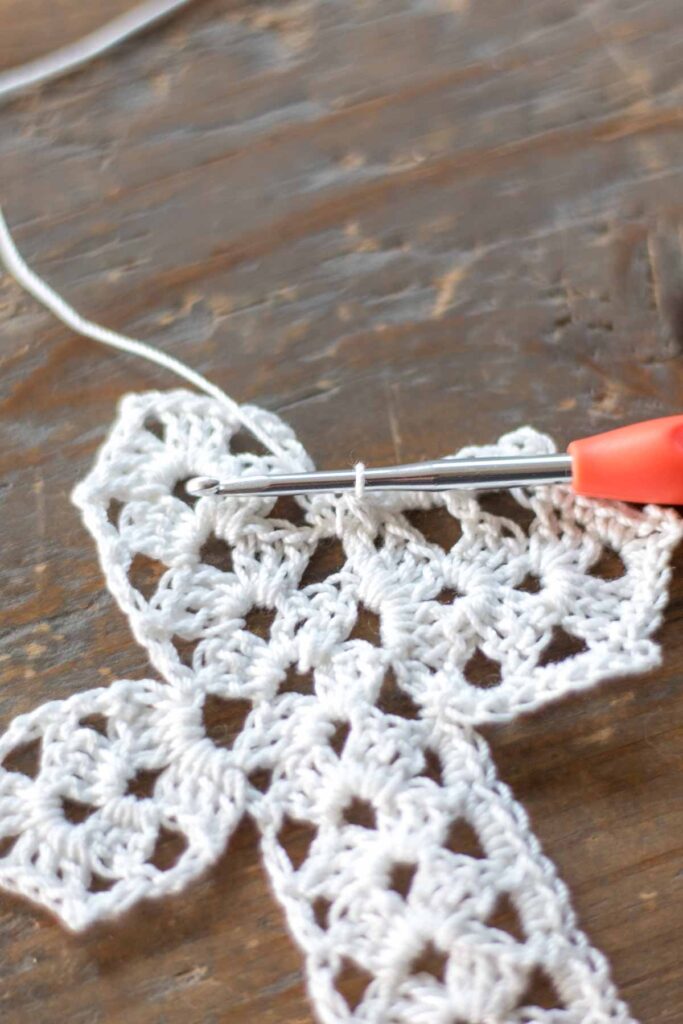
Sc2tog at corner spaces, 3 dc in next 12 spaces.
Sc in next 6 sts in the round, ch 25, 2 sc into the center of the tassel loop to attach.

Sl st up the back of the ch 25, sc in next 5 sts in the round, sl st to top of first sc in the round.
Tie off and weave in loose ends.
FAQ
More Handmade Gifts
- Christmas Star and Cross Bookmark
- Wool Felt Ball Trivets
- Simple DIY Potholders
- Flour Sack Towel Waist Apron
Find more patterns and tutorials here!
Did You Make This Pattern?
I would love for you to share it with me!
Pin It For Later