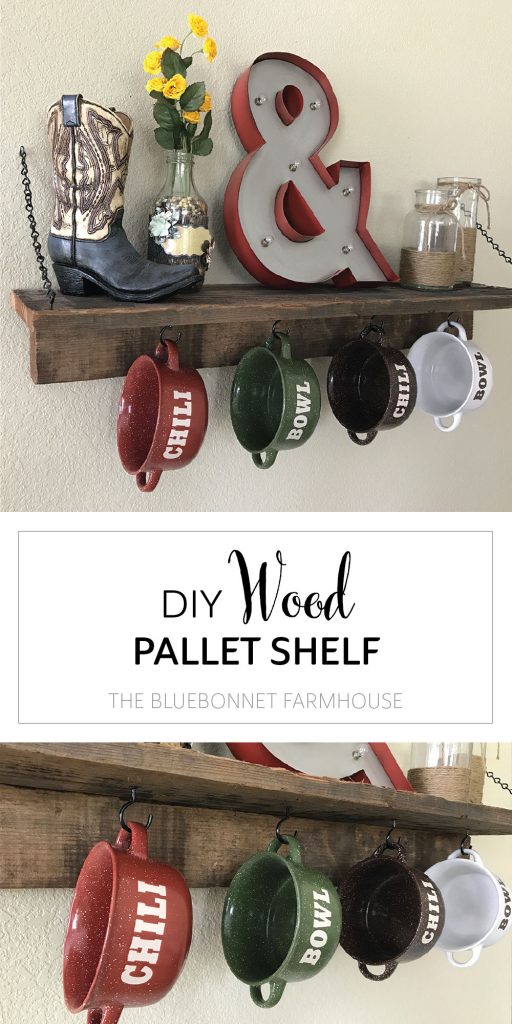
DIY WOOD PALLET SHELF
Learn how to build this easy farmhouse wall shelf on a budget! Display your favorite coffee mugs, chili bowls, dog leashes, etc. All you need is a little scrap wood, some chain, and a tiny bit of time.
This post contains affiliate links used to help support The Bluebonnet Farmhouse. For more information, please see my disclosures here.
When I was in college, I found these adorable chili bowls for only $1 each (a dollar!!) at my local grocery store. Am I the only one that was love-struck by that price? The price was perfect for a tight budget college student like myself!
I loved the antique, western flair of the bowls and wanted to use them as decor in my apartment. For starters, I did not have a wall shelf at the time – keep in mind a broke college student – but I did have a pallet and my dad’s tools.
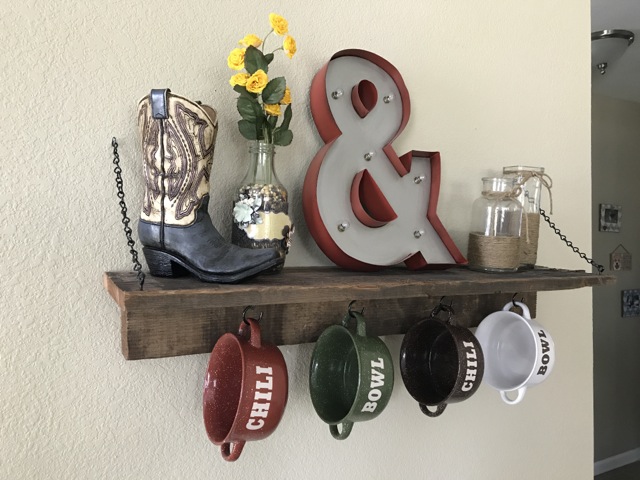
I chose to do a basic construction, but added the chains for a unique feature and enhanced stability. By keeping the construction of the shelf simple, it accentuates the rustic aesthetics of both the shelf and the chili bowls.
The shelf ended up being an ideal size – not too big, not too small – because no matter where the Navy sent us, we have easily been able to find a wall to accommodate it!
This beautiful hunk of wood has moved with us between two apartments plus one home, and has been used in the kitchen, dining room, and entryway. You can see how we used it in our dining room here.
This cute little shelf is a quick and easy project to add some rustic flair into your home. Are you ready to start making your own rustic shelf? Check out our tutorial below!
MATERIALS
- 1×8 Board
- 2×4 Board
- 2’ #14 Black Jack Chain
- (4) #8 Steel Eye Screws
- (4) 1” Steel Cup Hooks
- (3) 2” Black Screws
- (2) 4” Black Screws
- Black Spray Paint
- Long Nose Pliers
- Circular Saw
- Drill
- 2 Bar Clamps (optional)
NOTE: I was able to get my hands on a very unique and gorgeous wood pallet that was used to deliver some furniture. I have no clue what kind of wood the pallet was made of, but I do know that it did not require staining – yay!
I have since not seen another pallet made of these quality 1×8 planks instead of the typical 1×4 pine. Therefore, you may have to use and stain scrap wood or purchase new boards.
PREPARATION
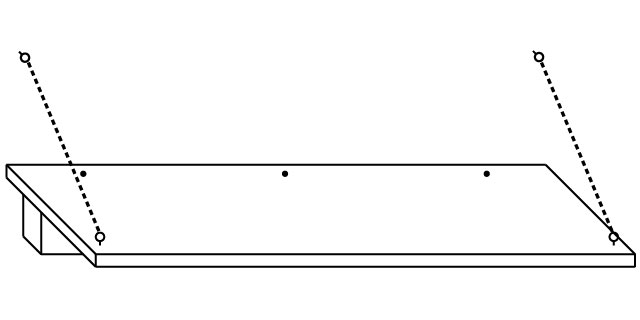
Cut the wood to size. You will need a 1×8 board cut to 32” and a 2×4 board cut to 30”.
Use pliers to detach the links of the jack chain and create two 9½” long strands.
Paint the steel eye screws and cup hooks with black paint.
ASSEMBLY
Lay the 1×8 board with the top facing up. Drill pilot holes ¾” x ¾” away from the two front corners where two of the steel eye screws will be and hand screw the eyes into the holes.
Use pliers to open the end links on the chains and attach them to each eye. Be careful to not chip the black coating of the chain, otherwise simply touch it up with the black paint previously used.
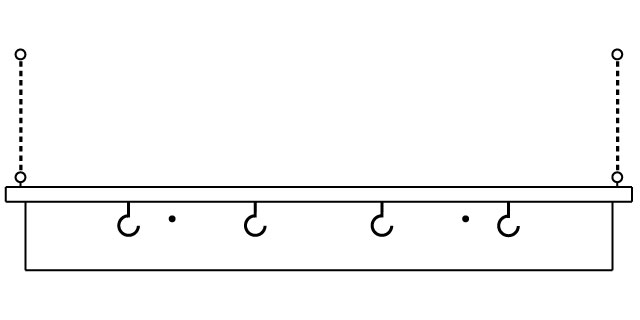
Use clamps – or your husband – to hold the back of the 1×8 to the top off the 2×4. Evenly space the three 2” screws along the back of the 1×8, drill pilot holes, and drill in the screws to attach the two boards.
Remove the clamps and lay the shelf with the topside facing down. Evenly space the four cup hooks across the underside of the 1×8. Drill pilot holes and hand screw the cup hooks into the holes.
You’re shelf is done and all that’s left to do is to hang it up!
INSTALLATION
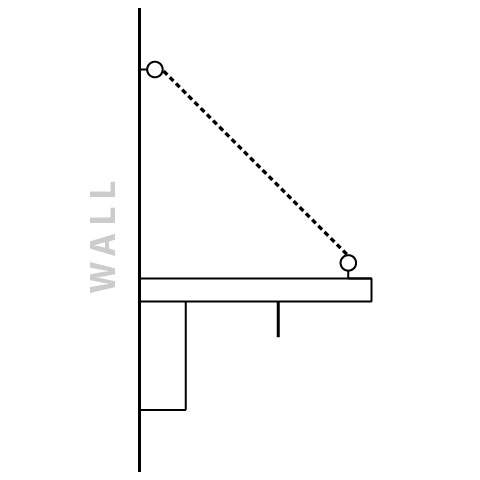
Hold the finished shelf against the wall and make sure it is level. Drill two pilot holes through the 2×4 and into the wall. Next, drill the two 4” screws into the pilot holes to attach the shelf to the wall.
You can choose to add more screws depending on the anticipated weight of décor.
Lastly, take the chain and extend it towards the wall until taut. To ensure a tight tension, leave a small space between the wall and the end of the chain to allow for the eye screws to fit in between.
Mark the location for the two steel eye screws, drill small pilot holes, and hand screw the eyes into the wall. Use the pliers once more to open the end links on the chains and attach them to each eye.
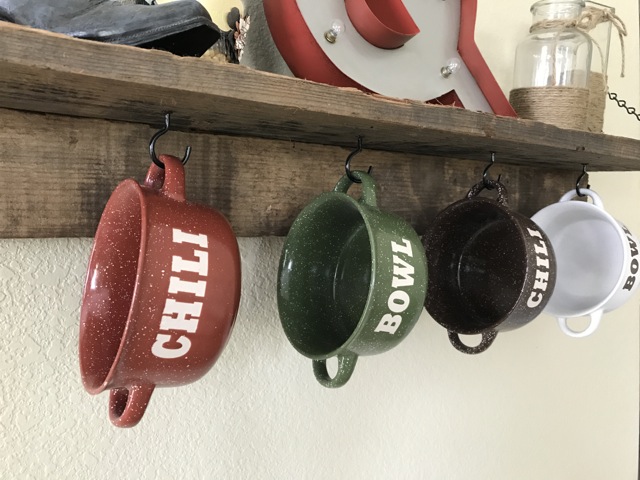
Time to decorate! Hang your favorite chili bowls or coffee cups and enjoy your new pallet and chain shelf!
RELATED POSTS:
- Rustic Farmhouse Decor with Budget Decorating Tips
- DIY Chalkboard Serving Tray
- DIY Chalkboard Wine Bottles
Comment below or tag us on social media to share your finished shelf! Thanks for following along!
