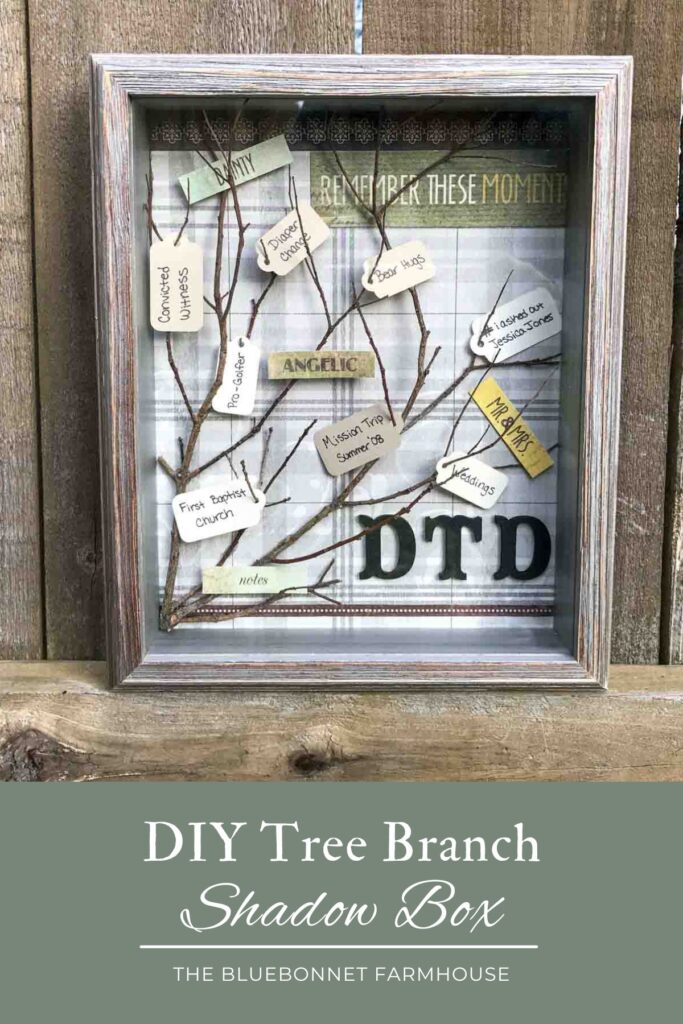
DIY Tree Branch Shadow Box
This post may contain affiliate links. Please see our disclosure policy.
Learn how to make a DIY tree branch shadow box full of memories with just some twigs and paper. This unique keepsake is a great way to illustrate a family tree or remember all of the moments from vacation, a life milestone, or even a memorial of a loved one.
The inspiration for this tree branch shadow box actually came out of heartbreak. We had just lost a close friend to a tragic accident who left behind his everything – a loving wife and two babies.
When asked what his wife needed, her response was simply to share our memories of her husband to help keep his memory alive.
My initial thought was to make a scrapbook, but after going through a few different ideas, I felt I had finally come up with a handmade gift that simply felt right; a memory box.
A memory box would allow for many sweet and funny moments to be on display in their home where she can reminisce in them each day and share those stories with her children.
It warmed our hearts to share smiles and laughter together over the stories with her and their babies.
“I am the vine; you are the branches. If you remain in me and I in you, you will bear much fruit; apart from me you can do nothing.”
John 15:5
Tips
- Be sure to take into account the 1/8 to 1/4 inch lip where the back panel sets into place in the shadow box frame when gluing down your detailing. This ensures you will be able to close the shadow box and none of the decorations will be covered by the frame.
- Fully dry any floral or wet branches and twigs before placing inside the shadow box. Refer to FAQ for how to dry.
- Clean the glass of the shadow box before assembly to prevent finding any annoying interior smudges after.
Variations of this Project
Dried floral – Use dried floral on its own like in this post or mixed in with the tree branches.
Family tree – Write names on the tags and family member pictures on the background with tree branches overlaid in front.
Milestones – Capture all of life’s greatest moments from high school and college to weddings and baby announcements.
Fun memories – Showcase your adventures from vacation, camp, mission trips, and more.
Memorial – Use as a sweet reminder of the memories and qualities of a lost loved one.
Supplies
Shadow box – I used an 8 inch x 10 inch.
Paper – Scrapbook paper, cardstock, or kraft paper. Could also use fabric for the background.
Tree branches and twigs
Wooden letters – I used 1.25″ letters. Another cute option would be wood letter tiles like the game Scrabble.
Paint or stain – For use with the wood letters.
Hot glue gun – This detail tipped one is my preferred for use with the delicate twigs.
Glue stick
Cricut machine – Used for cutting out the paper tags or you could use paper tags like these.
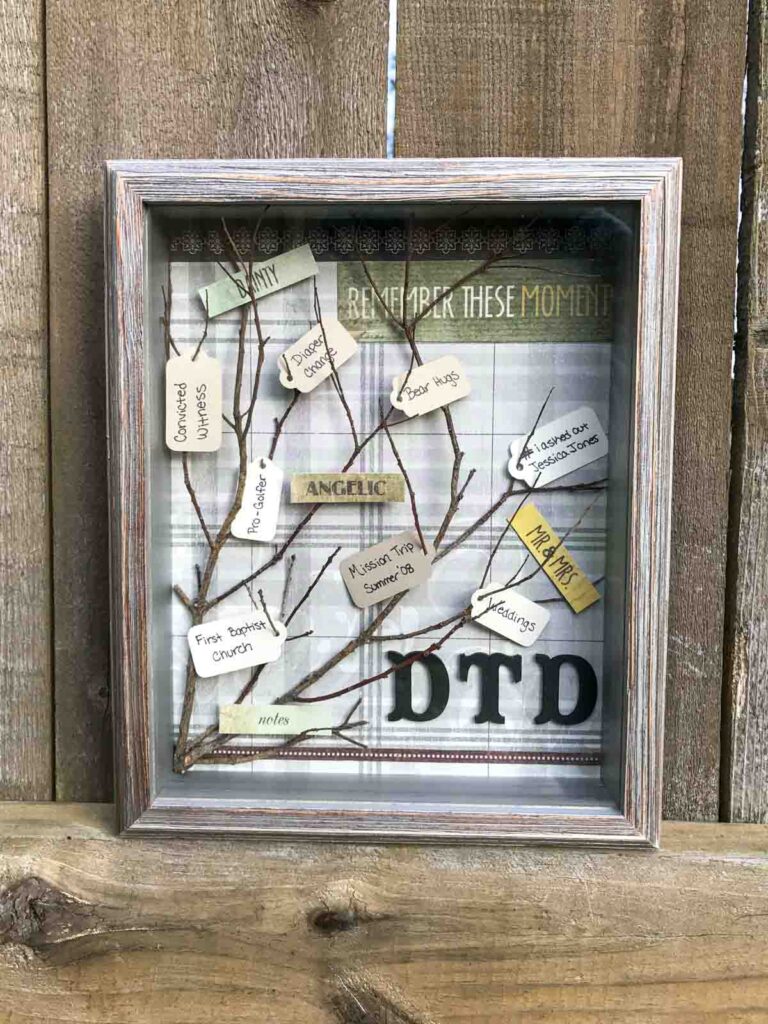
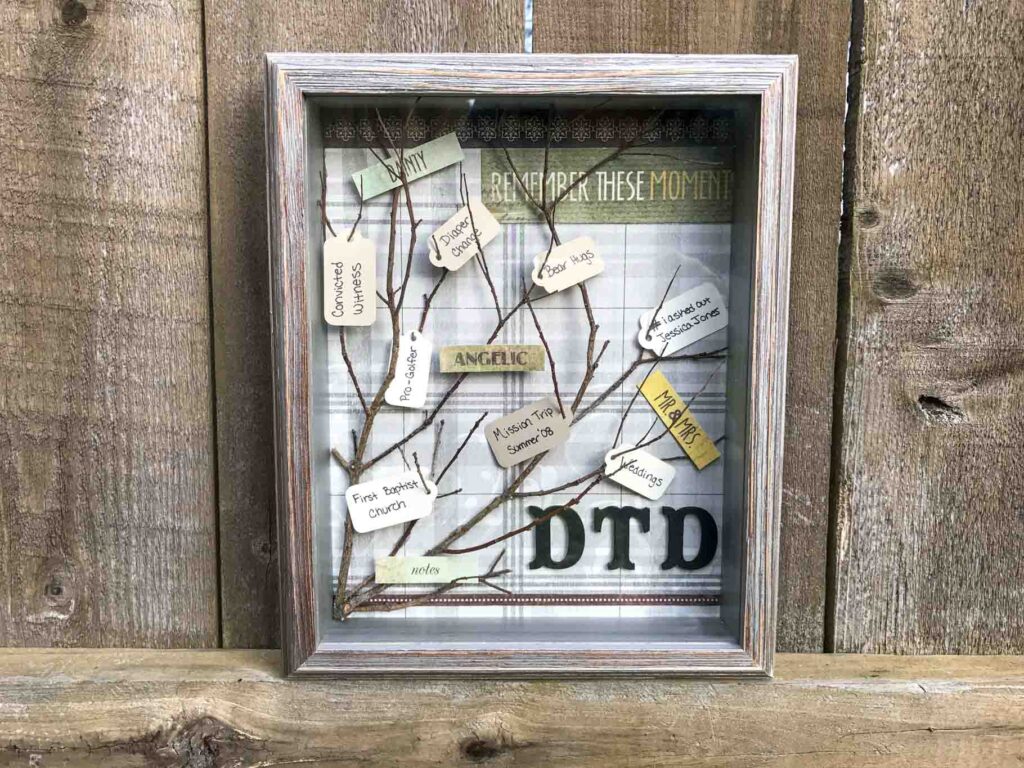
How to Make a Tree Branch Shadow Box
This project tutorial follows the same basic process as my dried flower shadow box: you begin with the background first and then move forward towards the glass.
Background Panel
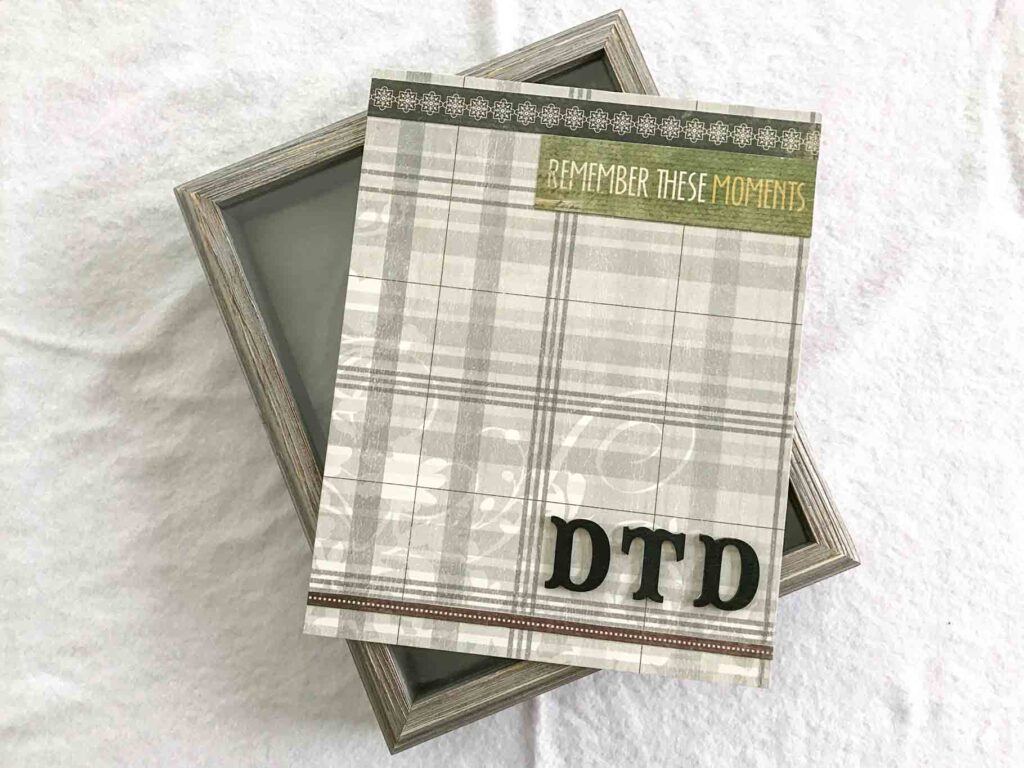
Cut the background material to fit the back panel of the shadow box and use a glue stick to attach. Using a glue stick for adhering the background will prevent any uneven or warped surfaces.
Add any additional detailing such as decorative cut outs, phrases, personal items, etc.

Wooden Letters
Paint, stain, or leave the wooden letters unfinished and adhere them to the background with a hot glue gun.
For this project, I chose to personalize it with his initials.
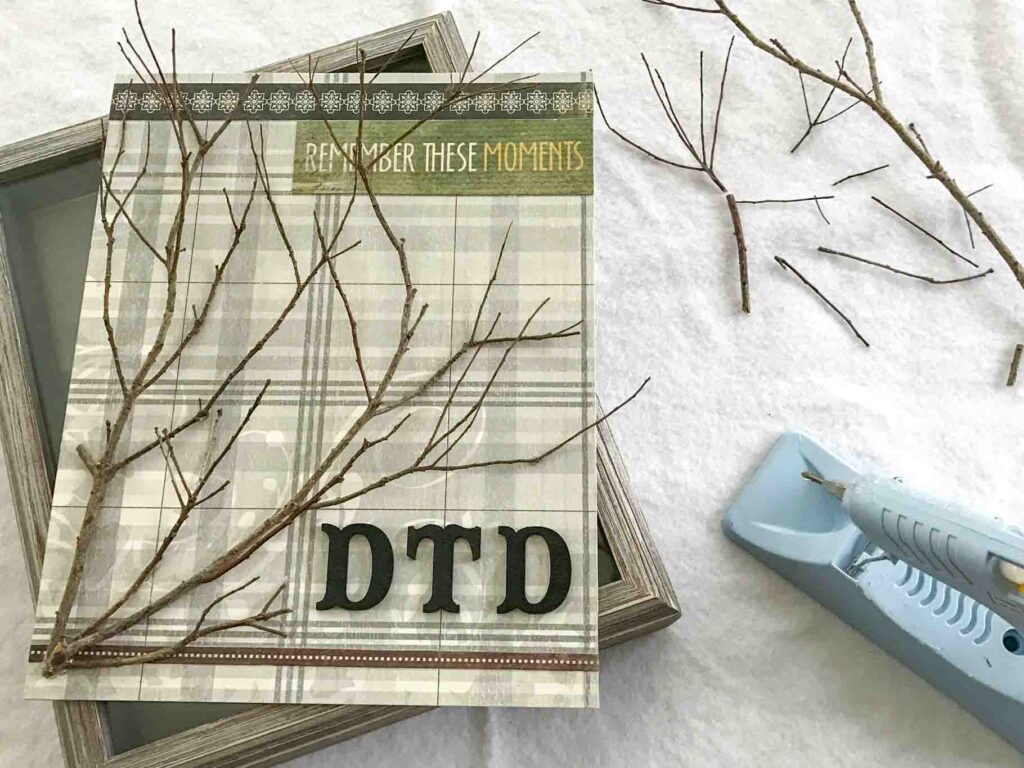
Pieces of Nature
Cut and arrange the tree limbs while keeping in mind that the placement does not interfere with the closure of the shadow box.
Use the hot glue gun to attach the pieces to the background panel.
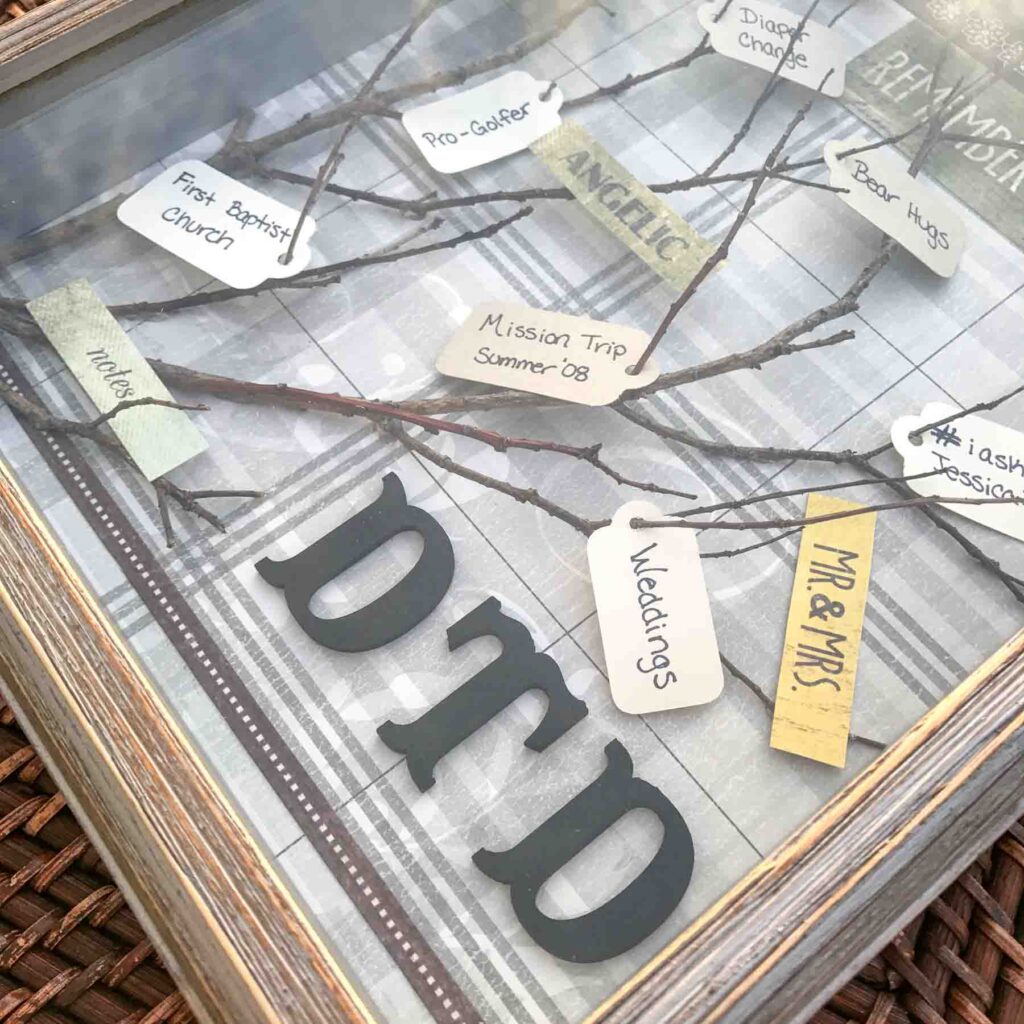
Paper Tags
Using scissors or a Cricut, cut out tags using cardstock or kraft paper.
Choose your favorite memories to share, write them down, and arrange them to your liking.
Use two drops of glue from the hot glue gun on each tag to adhere them to the branches. This will keep the tags in place and prevent them from moving around on the branch.
Given the inspiration for this project, I used a combination of paper tags and descriptive words cut out from a piece of scrapbook paper to represent memories.
Assembly
After a final wipe down of the glass, gently lay the background panel into place in the back of the frame and secure the latches on the shadow box.
There you have it! A unique and nature inspired easy craft perfect for home decor or a handmade gift.
Tutorial FAQ
More Handmade Gifts
- Dried Flower Shadow Box
- Wool Felt Ball Trivets
- Simple DIY Potholders
- Flour Sack Towel Waist Apron
- Crochet Cross Bookmark Pattern
Find more patterns and tutorials here!
I hope you enjoyed this tutorial! Please let me know in the comments below or tag me on Instagram @the_bluebonnet_farmhouse to share your creation!
Pin It For Later