How to Make a DIY Heart Garland
Learn how to make a DIY heart garland with our free printable and Cricut file. Perfect for weddings, bridal showers, baby showers, and Valentine’s decor!
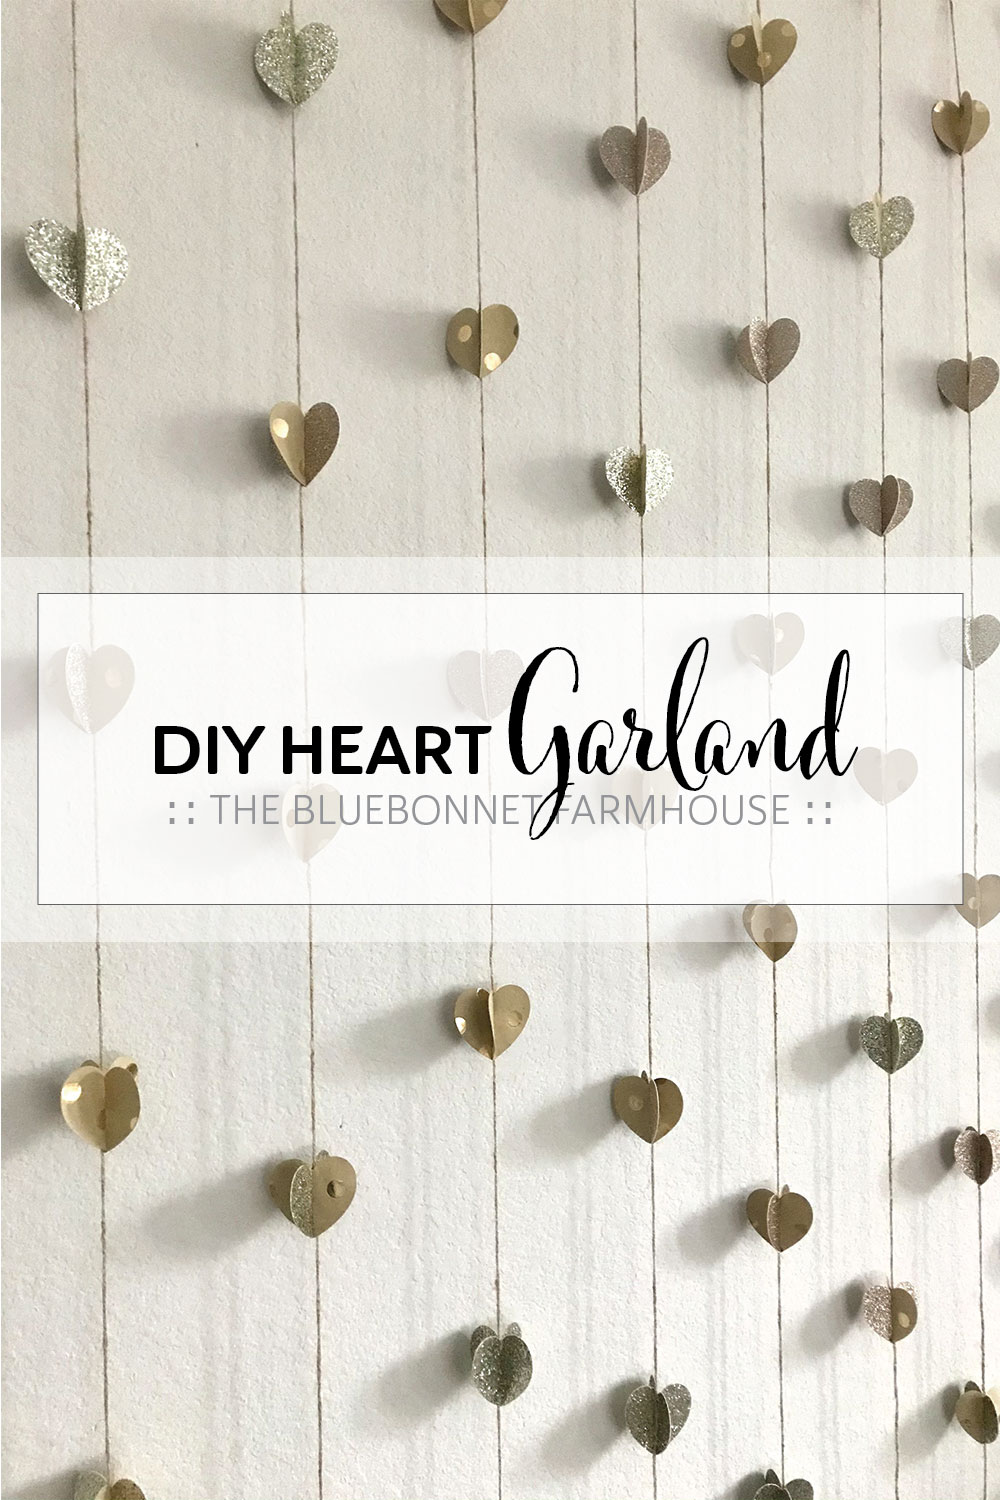
Love is in full bloom! Valentine’s Day is right around the corner and there must be something in the water. I don’t know about you, but I have been seeing loads of engagements and pregnancy announcements lately. And you know what that means – bridal showers, weddings, and babies!!
With every wedding comes a bridal shower and with every baby comes a baby shower, both of which need decorations! Why not make decor that can be used for both?!
Plus, this heart garland works perfect for Valentine’s Day! I am currently using this garland and this door decor in my home for Valentine’s Day!
How to Make a Heart Garland
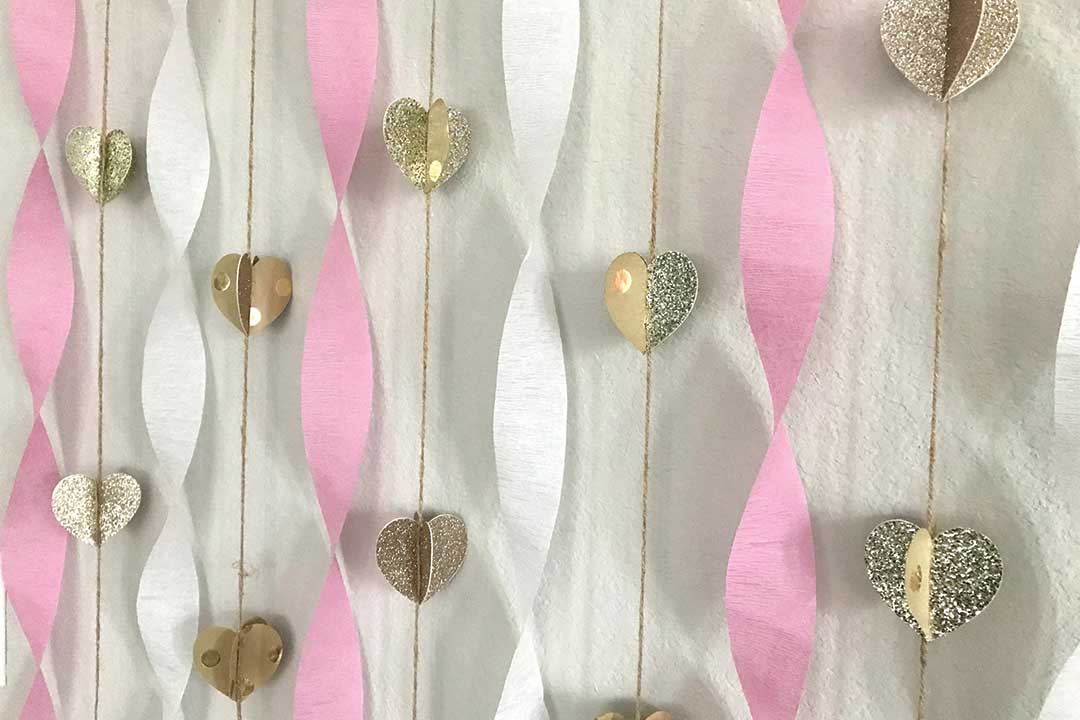
This garland project came about when I was helping to plan a close friends bridal brunch. I knew I wanted to keep this garland for future use, so I decided to stick with neutral tones to use it for other purposes.
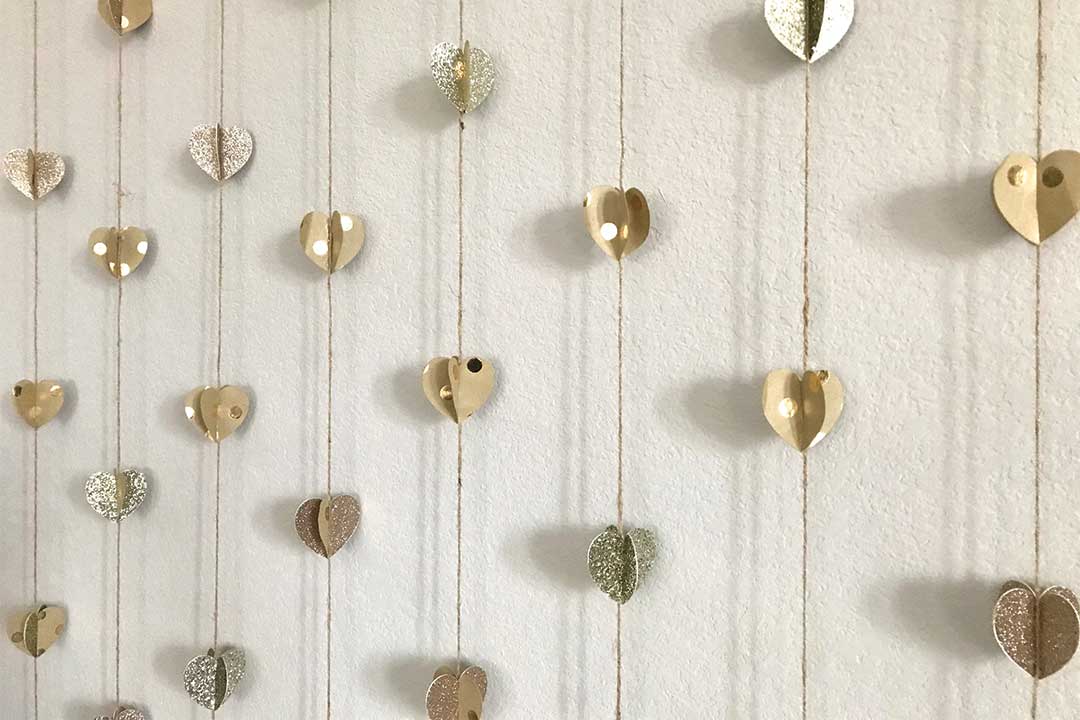
I chose to use pink and gold glitter scrapbook paper in addition to some natural colored brown wrapping paper with gold dots.
The shimmering neutral tones and twine used in this garland pair beautifully for a subtle farmhouse look.
We have had this heart garland for a couple of years now and I am still finding more ways to use it!
Various Ways to Use this DIY Heart Garland:
- Hang on a wall as a backdrop for photos.
- Pair with streamers for a party.
- Pink + White streamers for bridal shower or Valentine’s Day.
- Pink + Blue streams for baby shower or gender reveal.
- Use as a decorative garland on fireplace mantels and stairways.
- Decor in a nursery or little girls room.
This post contains affiliate links. For more information, see my disclosures here.
Two Ways to Make the Hearts:
There are two different ways to make these Valentine’s hearts: by hand or using a Cricut.
I highly recommend the Cricut, I absolutely love mine and it is much faster at cutting than I am!
If making the hearts by hand simply skip Step 2 and Step 3 below.
You can find the project files for both the free printable and Cricut svg file for this project below.
Supplies:
- Paper (scrapbook, cardstock, or wrapping paper)
- Twine
- Tacky Glue
- Scissors
- Project File (can be found in my free subscriber library, fill out the form below to get the password!)
- Cutting Mat
- Cricut Machine
- Cricut Design Space
Step 01 – Plan the Garland
Determine the number and length of your garland. I made a total of 8 strands of garland and each strand at 6′ 8″ long.
Next, plan out how many hearts you want on each garland. I placed 7 hearts on each and alternated their locations every other strand.
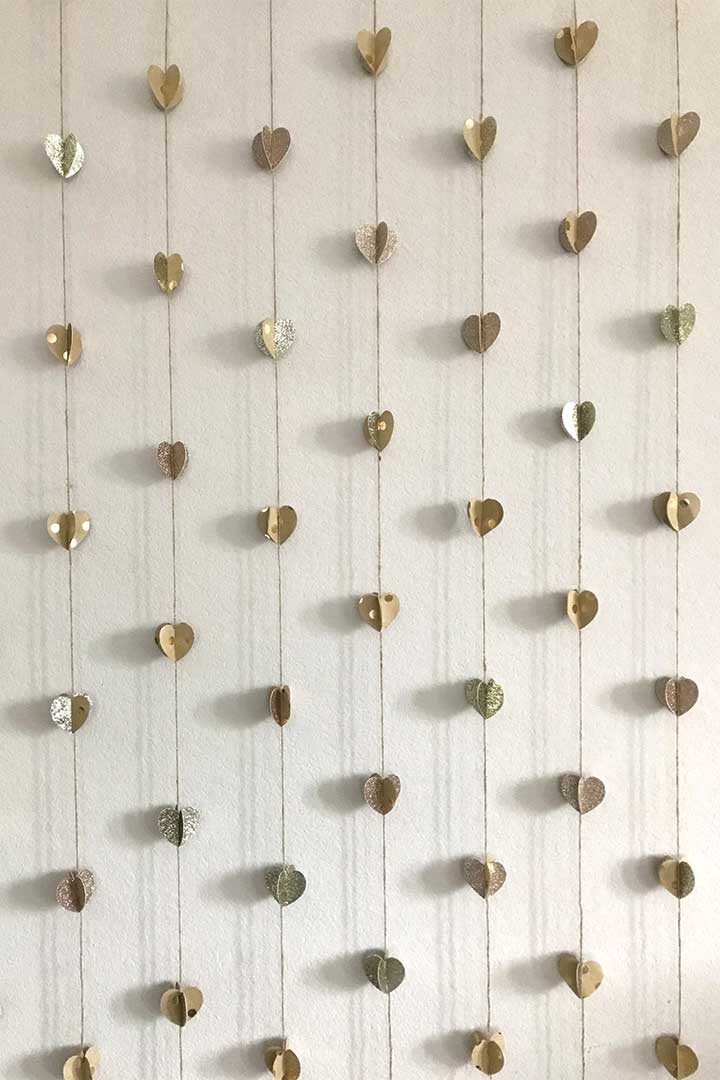
Calculate how many pieces need to be cut. If using one-sided paper, each 3D heart will need 4 pieces in order to make them double-sided. Only two hearts are needed for double-sided paper.
For my hearts, I used scrapbook paper and wrapping paper that were only one-sided. Therefore, each heart needed 4 pieces. I preferred this because it made the the hearts stiffer and more sturdy.
Step 02 – Set Up the Cricut File
Open the Cricut Design Space app and connect your Cricut machine to your computer.
Due to legal reasons, Cricut does not allow creators to share projects on Design Space that contain custom images. Because of this, I can share my custom images directly and you simply have to upload them onto your canvas in Design Space.
You can find and download the custom images in the project file here.
Begin by opening a blank canvas and clicking upload > upload image > browse > and find the downloaded file on your computer.
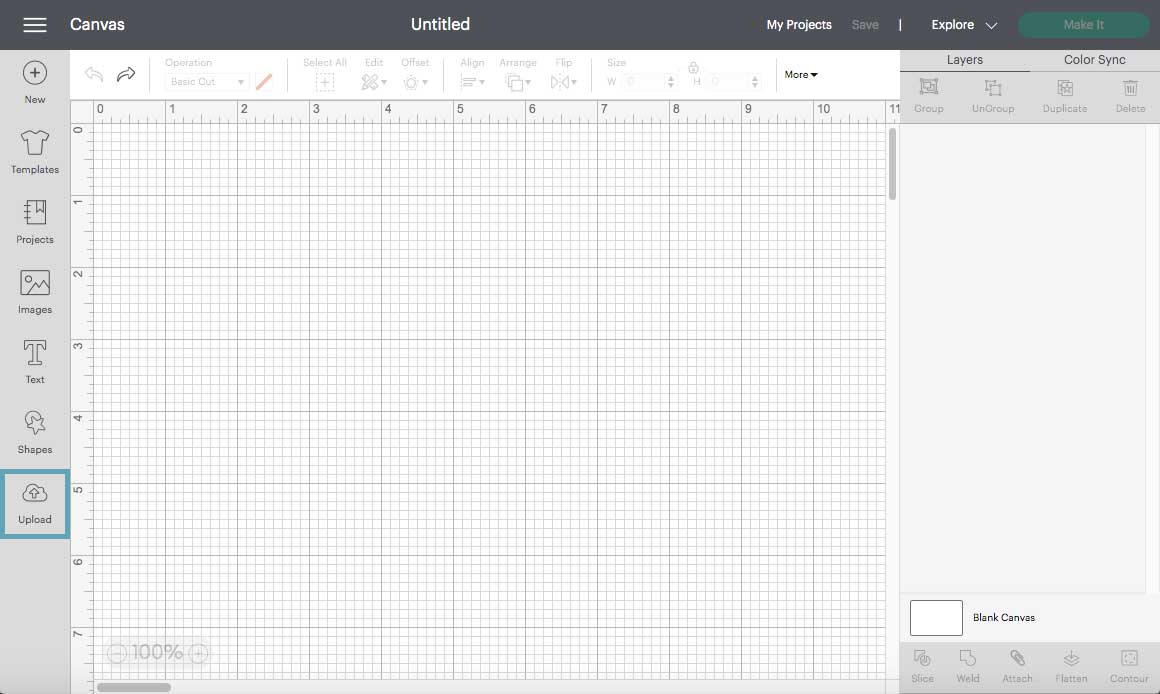
Here you can choose whether to upload the preset file for a 12″x12″ mat or the single heart for editing size and quantity.
After uploading the file, select image type “simple” > apply & continue > cut image > upload.
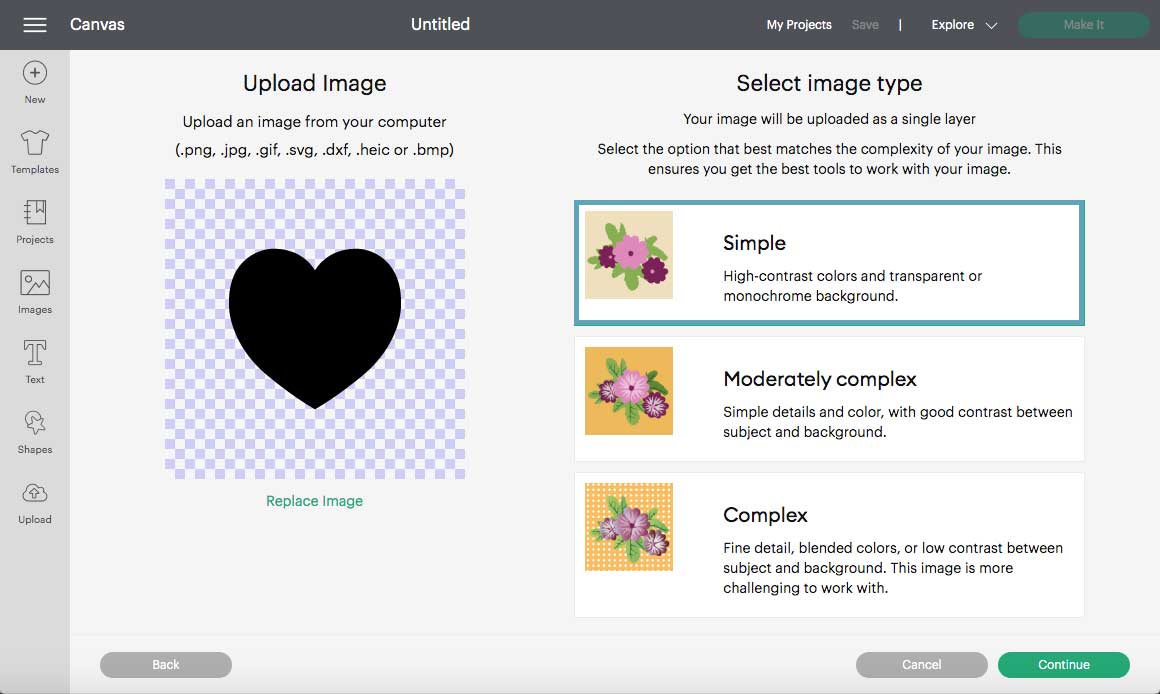
Select the uploaded image under “Recent Uploads” and click “add to canvas”.
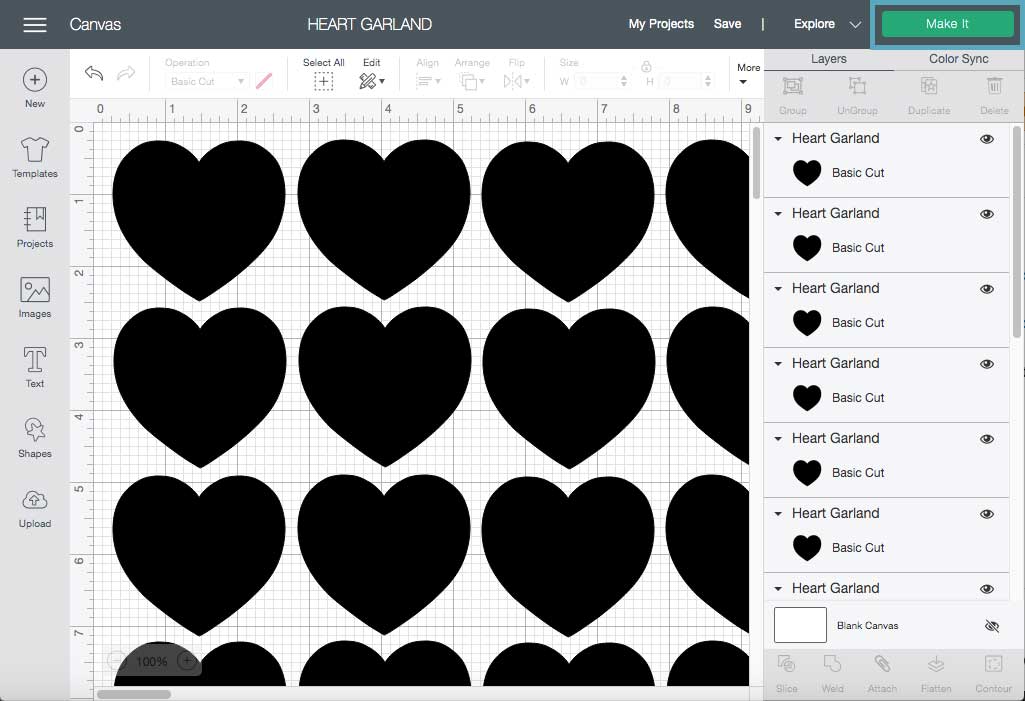
If choosing the single heart, duplicate or resize any hearts needed to fit on your paper size and arrange on the canvas.
Press the “Make It” button in the top right corner.
Step 03 – Cut the Design
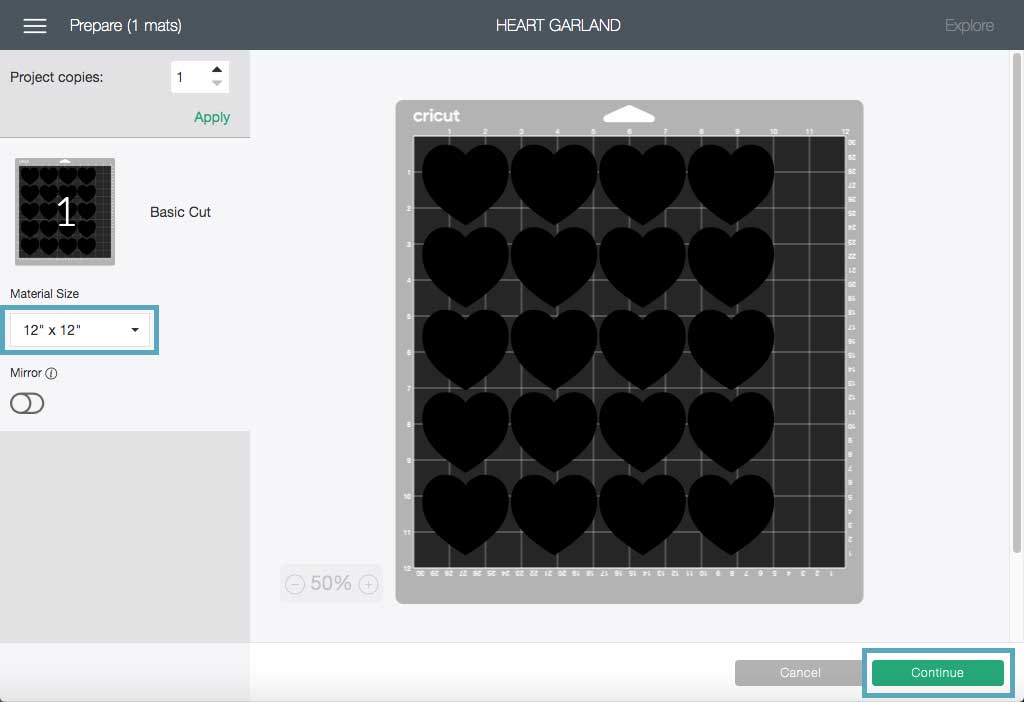
Select your material size in the left margin. You may have to rearrange the final cut layout on this screen. Press “Continue” in the lower right corner.
Follow the prompted instructions on the screen to ensure your machine settings are ready.
Place the paper on the machine cutting mat and load the mat into the machine by pressing the double arrow button on the machine.
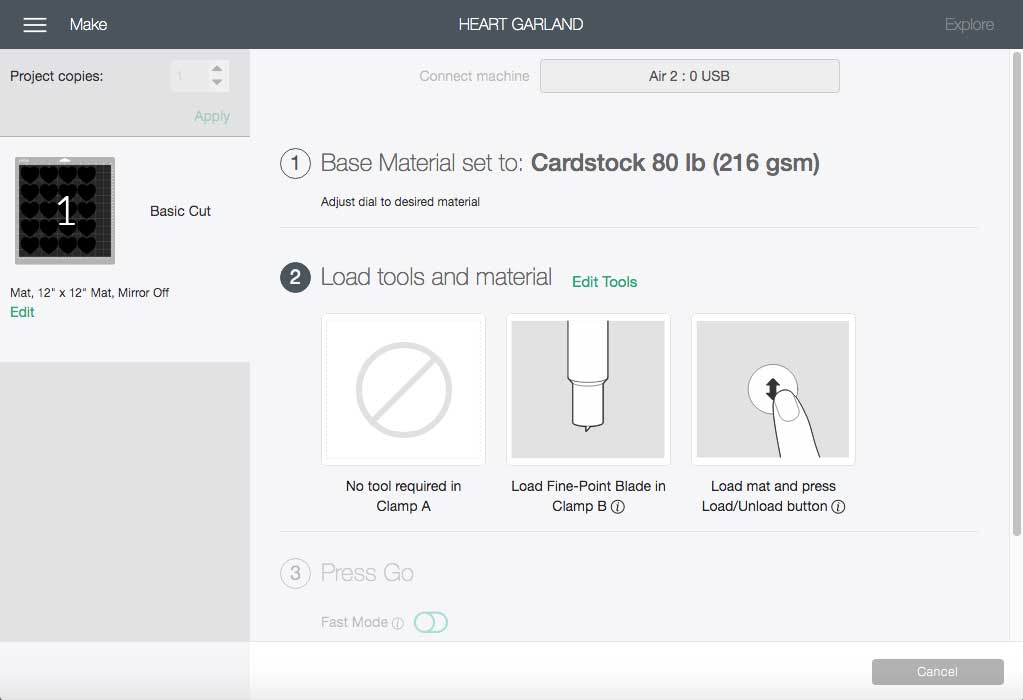
Press the Cricut logo button on the machine to begin the cut.
After the cut is complete, unload the mat with the double arrow button and load a new sheet of paper onto the mat. Continue cutting the design until you have all the pieces required.
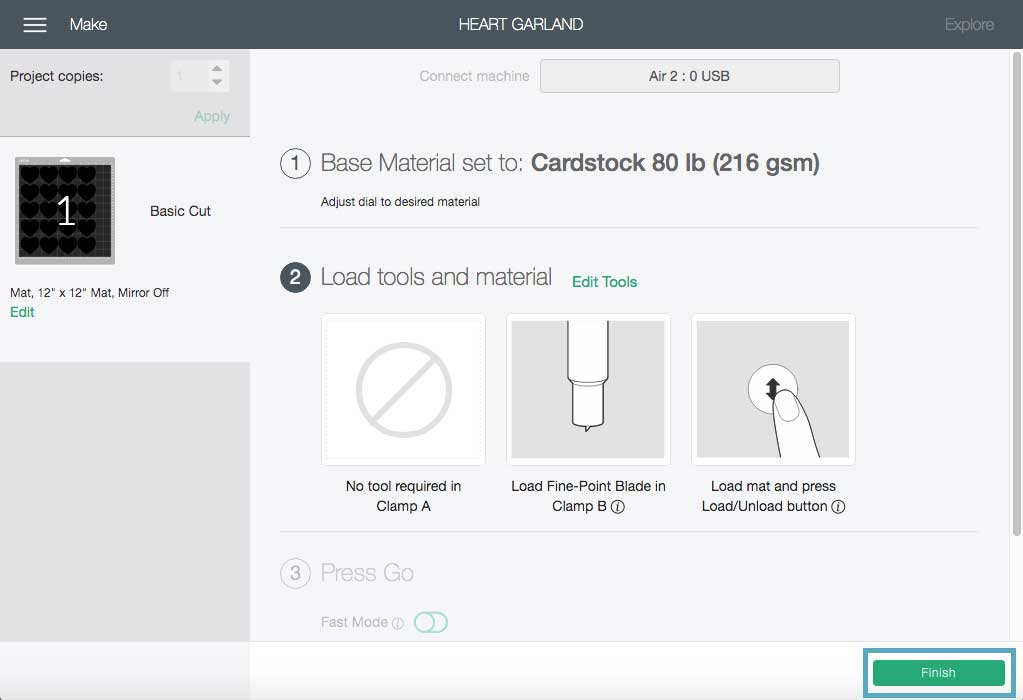
Once you have enough hearts cut out, unload the mat and press the “Finish” button in the bottom right corner.
Step 04 – Assemble the Hearts
It takes two hearts to create one 3D heart. If using one-sided paper, paste together two matching pieces to create a double-sided heart.
Mix and match the hearts to find combinations that you love and place them into pairs.
For every pair of hearts, cut a line down the center from the top to the middle of one heart, and the bottom to the middle of the other heart.
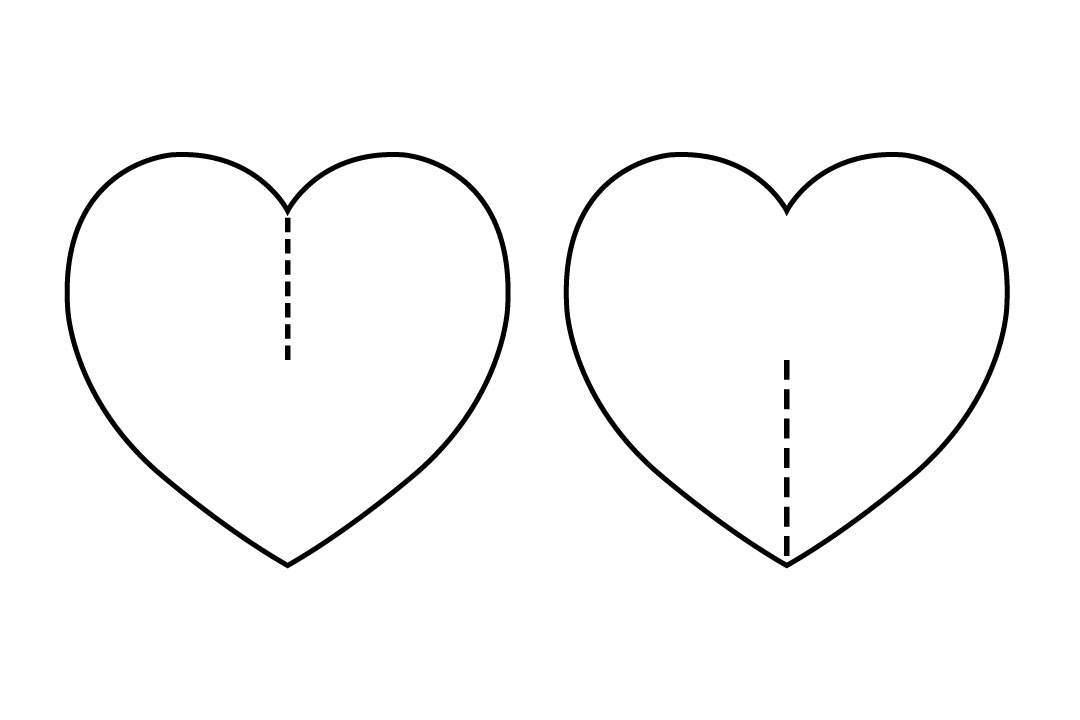
Slide the two hearts together to form a 3D heart and place a string of glue down the seam. Place the 3D hearts upside down to dry.
Step 05 – Make the Heart Garland
Once the glue dries, lay the hearts along the twine to determine placement. I placed each of my hearts 8″ apart and shifted the pattern down by 4″ for every other garland.
Lastly, attach the hearts to the twine with glue at the seam and let dry.
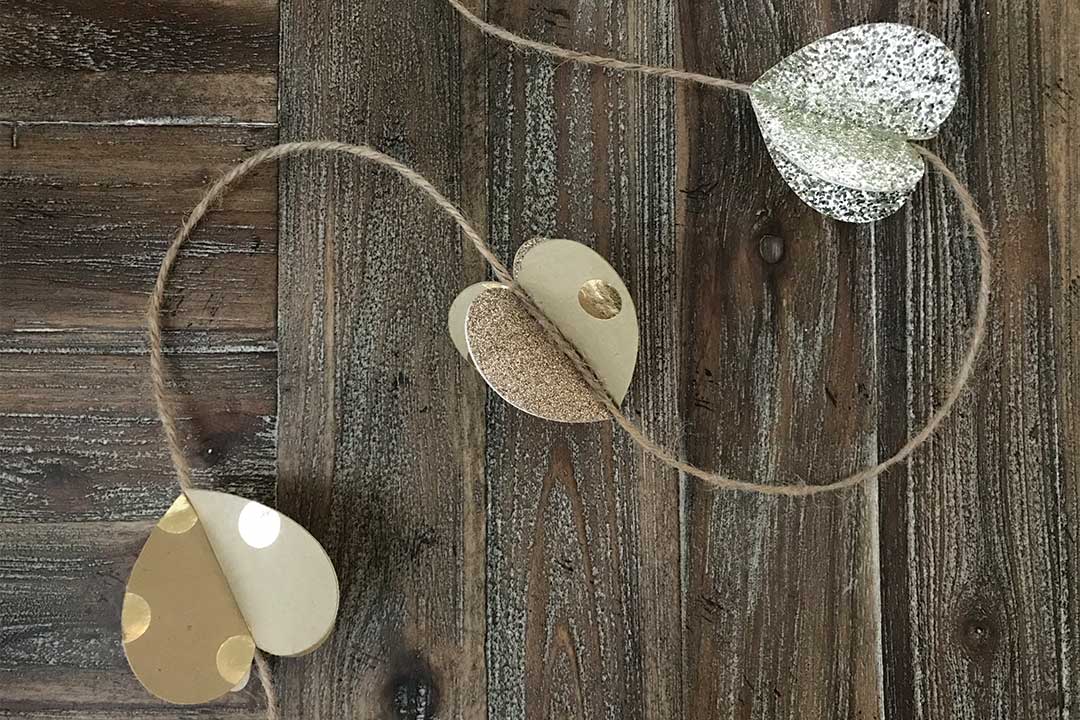
Hang up the strands of hearts and enjoy your new DIY heart garland!
Printable tutorial available below!
More Valentine’s Day Projects:
How did you use your DIY Heart Garland? Share it with us! Tag us on social media with your creation!
Pin it for Later:

DIY Heart Garland
Equipment
- project file
- Cricut machine
- Cricut Design Space
Materials
- paper (scrapbook, cardstock, or wrapping paper)
- twine
- tacky glue
- cutting mat
- scissors
Instructions
Step 01 – Plan the Garland
- Determine the number and length of your garland. I made a total of 8 strands of garland and each strand at 6′ 8″ long.
- Next, plan out how many hearts you want on each garland. I placed 7 hearts on each and alternated their locations every other strand.
- Calculate how many pieces need to be cut. If using one-sided paper, each 3D heart will need 4 pieces in order to make them double-sided. Only two hearts are needed for double-sided paper.
Step 02 – Set Up the Cricut File
- Open the Cricut Design Space app and connect your Cricut machine to your computer.
- Begin by opening a blank canvas and clicking upload > upload image > browse > and find the downloaded file on your computer.
- Here you can choose whether to upload the preset file for a 12″x12″ mat or the single heart for editing size and quantity.
- After uploading the file, select image type “simple” > apply & continue > cut image > upload.
- Select the uploaded image under “Recent Uploads” and click “add to canvas”.
- If choosing the single heart, duplicate or resize any hearts needed to fit on your paper size and arrange on the canvas.
- Press the “Make It” button in the top right corner.
Step 03 – Cut the Design
- Select your material size in the left margin. You may have to rearrange the final cut layout on this screen. Press “Continue” in the lower right corner.
- Follow the prompted instructions on the screen to ensure your machine settings are ready.
- Place the paper on the machine cutting mat and load the mat into the machine by pressing the double arrow button on the machine.
- Press the Cricut logo button on the machine to begin the cut.
- After the cut is complete, unload the mat with the double arrow button and load a new sheet of paper onto the mat. Continue cutting the design until you have all the pieces required.
- Once you have enough hearts cut out, unload the mat and press the “Finish” button in the bottom right corner.
Step 04 – Assemble the Hearts
- It takes two hearts to create one 3D heart. If using one-sided paper, paste together two matching pieces to create a double-sided heart.
- Mix and match the hearts to find combinations that you love and place them into pairs.
- For every pair of hearts, cut a line down the center from the top to the middle of one heart, and the bottom to the middle of the other heart.
- Slide the two hearts together to form a 3D heart and place a string of glue down the seam. Place the 3D hearts upside down to dry.
Step 05 – Make the Heart Garland
- Once the glue dries, lay the hearts along the twine to determine placement. I placed each of my hearts 8″ apart and shifted the pattern down by 4″ for every other garland.
- Lastly, attach the hearts to the twine with glue at the seam and let dry.
- Hang up the strands of hearts and enjoy your new DIY heart garland!

