WATCHES + RANKS: A GIFT FOR HIM
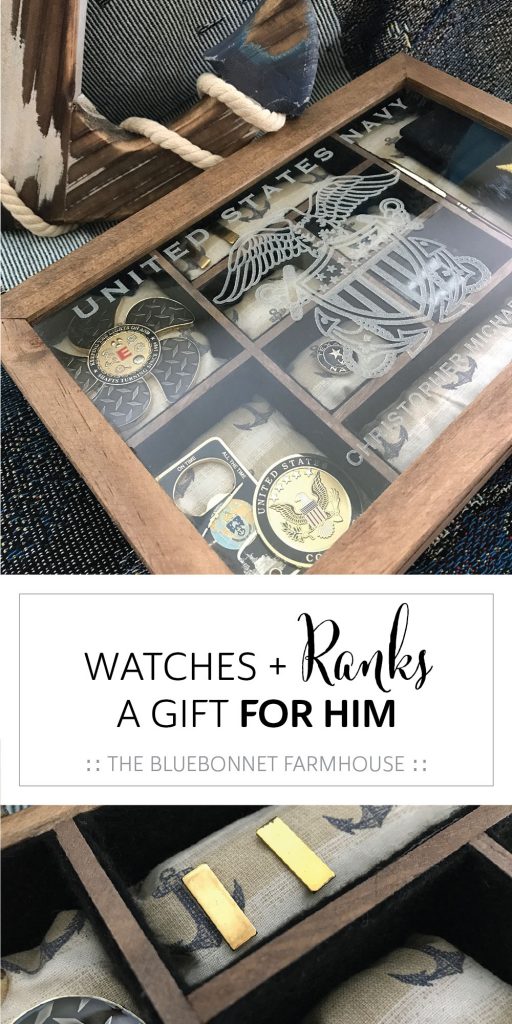
Need a gift idea for the man in your life? Learn how to make this custom storage box ideal for housing military ranks, watches, cuff links, and jewelry.
This post contains affiliate links used to help support The Bluebonnet Farmhouse. For more information, please see my disclosures here.
My husband, Chris, was on his first deployment when I made this military rank box for him. I wanted to make something special as a gift for when he got home and had come up with the idea several months before he even deployed. However, I chose to play it safe and wait until he was away to work on it so he wouldn’t accidentally find it!
After commissioning, he had been talking about needing to get some sort of box to store his ranks in. His solution, or at least the temporary one, was a plastic CD box… total guy move right there. I knew that wasn’t going to work because I wanted his ranks to have a special place for two different reasons. Not only will the contents of this box signify the time he spent serving our country, but it will also house the ranks my mother passed down to him from one of our fallen, LTJG Cole Patrick O’Neil. You can read more about why these ranks play an integral part in our story, Tragedy Turned to Treasure, in Chicken Soup for the Soul: Military Families.
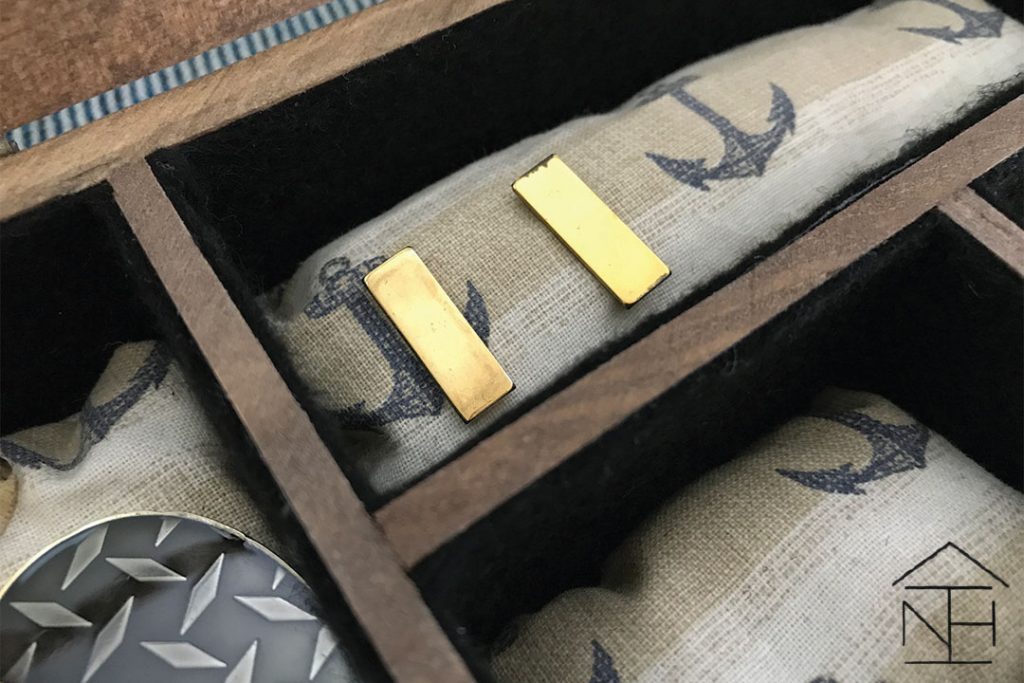
He was ecstatic when I gave it to him and I somehow managed to not spoil the surprise the entire time he was deployed. This rustic rank box was honestly the most exciting gift for me to give to my husband; it was sentimental for both being handmade for him by his wife and for what resides inside.
Not only would this be the perfect gift for military ranks, it is also great for a men’s watch and jewelry box! This really was a fun project! Continue below for the tutorial!
MATERIALS
- Unfinished Wood Jewelry Box w/ Glass Top
- Box Knife + Sandpaper (if removing some dividers)
- Painters Tape (if laser etching glass)
- Wood Stain (<< Highly recommend this one in Special Walnut! *See instructions below for more info.)
- Staining Rag
- Gloves + Mask
- Black Peel & Stick Craft Felt
- Polyester Fiber Fill
- 1/4 Yard of Fabric
- Ruler
- Needle + Thread
- Sewing Machine (optional)
- Glass Engraver (optional)
GLASS ENGRAVING
If you plan to get the glass engraved, begin with this step first and remove the lid from the box. I was in college studying architecture when I made this project for my husband; therefore, I had access to a laser cutter within the architecture wood shop to laser etch the glass for me. Some architecture colleges allow non-students access to the laser cutter for a fee in addition to completing a safety test.
If you have a very steady hand or want a handwritten look, you could try a handheld diamond-tipped engraver, but be sure to practice on a scrap piece of glass first! Otherwise, you could go to a glass engraving shop and have them professionally engrave the lid.
NOTE: If a laser is being used to etch the glass, cover the wooden edges of the lid with painter’s tape. The tape prevents the wood from getting any burn marks.
UPDATE: If you are not sure how to go about getting the glass engraved, feel free to send me a message or comment below and I would be more than happy to help! A friend of mine actually has a laser cutter and may be able to help us out!
REMOVE DIVIDERS
Before applying the stain, remove any wood dividers in the box that might be in the way for what it is meant to store. For example, I removed one divider on the right side of the box to create a larger space for Chris’s shoulder boards to fit in. You may want to do the same if watches are going to be stored in the box.
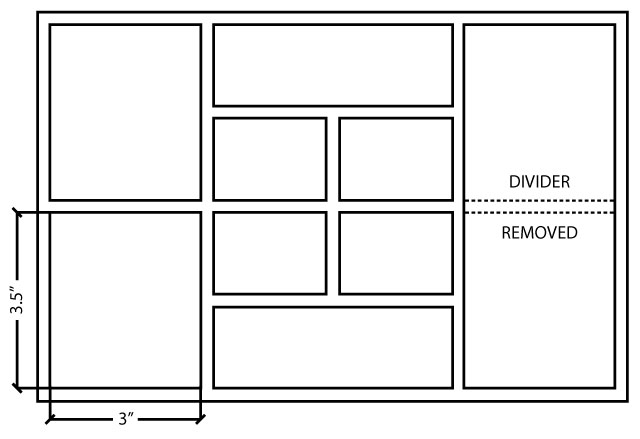
Be very careful when removing any of the dividers – you don’t want to break the ones you want to keep! Use a box knife to gradually wedge down between the pieces. I admit this is when my dad stepped in to help. I needed some pure manpower because the dividers in my box had been, what I believe to be were, industrially adhered together!
Once the pieces are detached, use the box knife to shave down any glue or wood residue to get a flat surface. Sand the area if necessary to achieve a smooth finished surface.
WOOD STAIN
Select your color of stain and remove any hardware from the box and lid. At the time, I had used Minwax Special Walnut, but would now highly recommend using this ECOS Paints Special Walnut. This wood stain is specifically meant for crafting projects such as this and is non-toxic, zero VOC, and no odor! All of which is a huge bonus for me considering I would always get migraines after working with conventional paints and stains.
Use your staining rag to apply the stain to the exterior and interior of the box. Apply additional coats until you reach the desired color and allow for adequate drying time between each coat.
I decided against applying polyurethane since the box will not come in contact with anything that would require it to be sealed. Also, I loved the unsealed look that the special walnut stain gave the wood; the color has a dry and slightly weathered vintage look.
Again, the Craft Stain by ECOS would have been ideal for this project because it incorporates a top coat resin that gives a subtle sheen and eliminates the need for a top coat altogether.
NOTE: Read all the directions on each product before use. Remember to stir the stain before use, do not shake. Always wear a mask and gloves when applying stain or polyurethane along with working in a well-ventilated space. A well-ventilated space creates a cleaner workspace to breathe in and faster drying time.
FELT LINING
Use a ruler to measure the interior surfaces you want to cover with felt while taking into account the thickness of the felt. Cut out the felt pieces, remove the paper backing, and adhere the felt inside the spaces. The peel and stick felt makes this quick and easy!
FABRIC CUSHIONS
Add 1” to both the length and width measurements of each space to get the dimensions for your cushions. This 1” addition accounts for ¼” seam around and ½” extra material both ways to make your cushions fluffy.
Cut two pieces of fabric for each cushion and lay them face-to-face. Hand stitch or use a sewing machine to sew your ¼” seam around. I did not have my sewing machine at this point and chose to hand stitch the cushions.
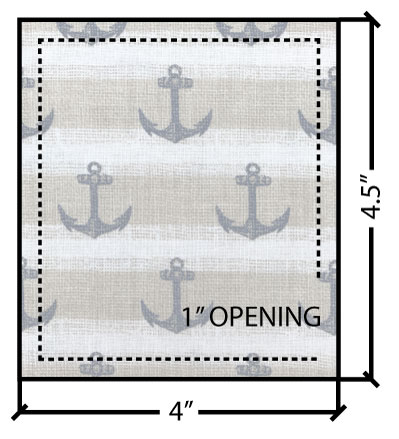
Leave a 1” opening and pull the fabric through the opening to turn the fabric correct side out. Fill the cushion with polyester fill to the desired thickness and complete your seam across the opening.
Place the cushions in their cozy spaces and reattach the hardware onto the box and lid.
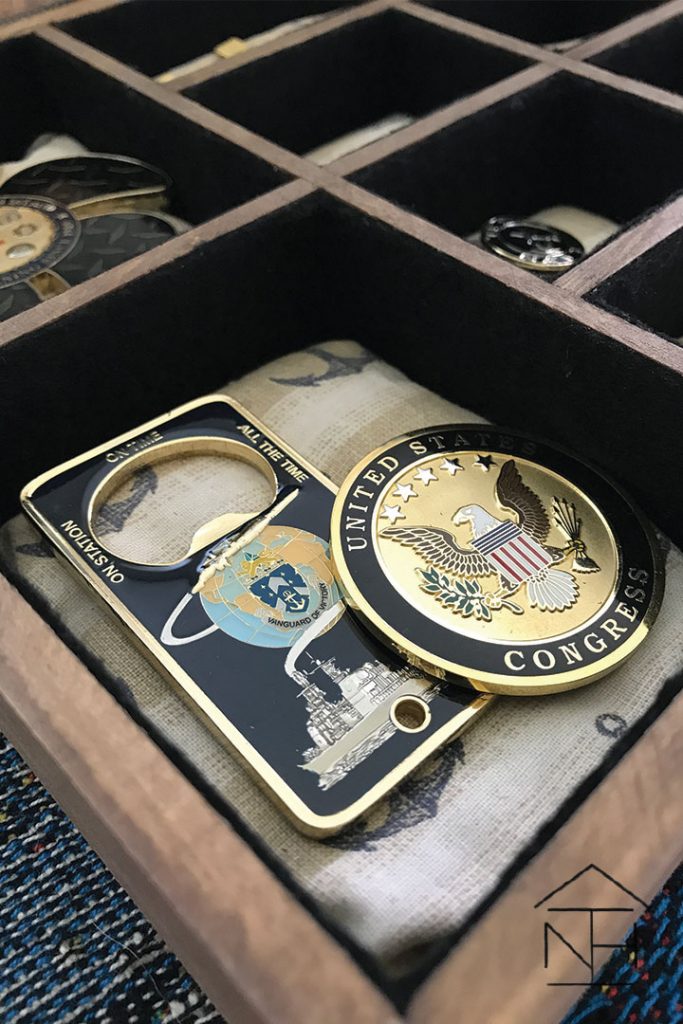
You’re done! Whether you made this for a service member to store his ranks or a husband to store his watches and cuff links, you now have a handmade gift any man is sure to love!
We would love to see your completed project! Tag The Bluebonnet Farmhouse on social media to share your project with us!
Thanks for following along! Happy Crafting!


