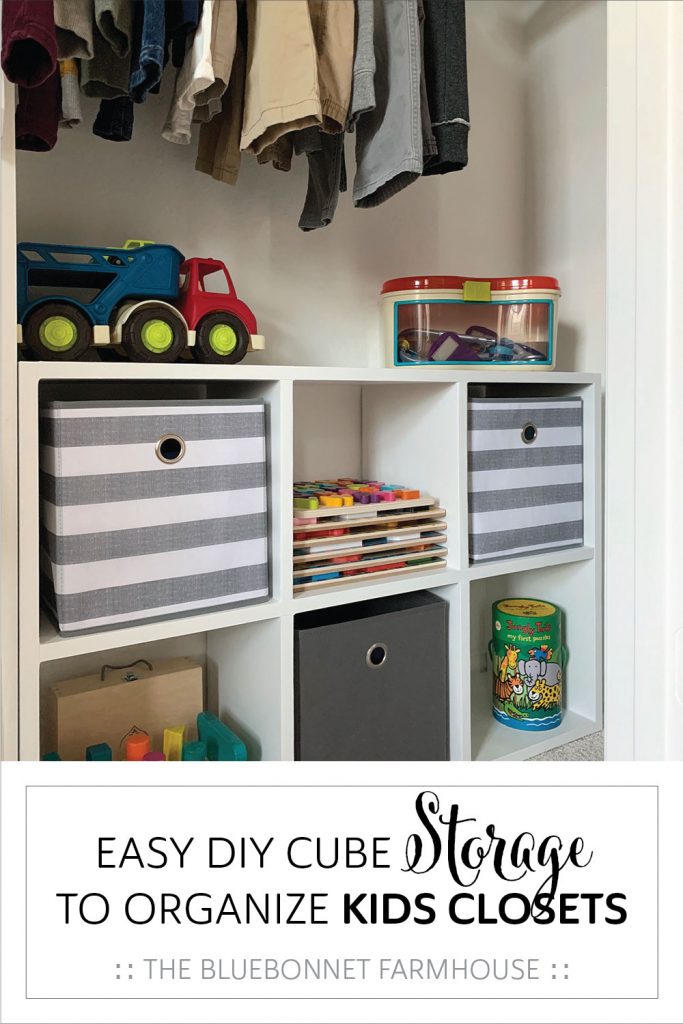
EASY DIY CUBE STORAGE TO ORGANIZE KIDS CLOSETS
Learn how to easily build a custom cubby organizer for your baby, toddler, and kids closets! Storage dimensions are an ideal size for a variety of favorite toys and helping little ones easily place bins inside the cubbies!
This post contains affiliate links used to help support The Bluebonnet Farmhouse. For more information, please see my disclosures here.
It all started after we moved into our new home and toys were everywhere! I had this beautiful picture in my mind of our toddler’s closet being perfectly organized, where every toy had a place and that place was not the floor. Not only for the aesthetics, but for the functionality as well.
Did you know kids play with their toys more when they are neatly organized and visible? It’s true, and when every toy has a place, kids are able to learn to keep their toys picked up at a younger age. Little ones are able to then know this is their toys “bed”, so to speak, and can start putting them back in their proper places without you even having to show them!
I witnessed this firsthand when I organized the toys in our game room for the very first time. It was amazing and clean for all of ten seconds until our toddler got ahold of the toys. BUT once he was done playing, believe it or not, he actually put everything back in its place without me ever saying a word or even showing him!! No joke, he even lined his four cars up in front of the race track like I initially had them! We are talking he is two years old and already organizing! Mom level: pro.
I totally get that you can find these cube storage units everywhere, but nothing seemed to work just right for our sons closet. His closet is one of those with the French doors and a foot or so of extra space beyond the door frame on each side.
OUR CRITERIA:
- Cubbies had to fit mostly within the door frame for easy access – preferably not in the tucked away corners of the closet if possible.
- If in the closet corners, there needed to be enough space to easily get bins in and out of cubbies.
- Needed to fit our son’s favorite puzzles (<< love this entire collection) and tall books too, like this one (<< and this collection, too).
- Needed to fit at least one hamper in the corner of the closet for extra, out of the way storage.
Sounds simple enough, right? Well here is the kicker, the cube bins come in 11” squares or 13” squares, which in turn means the storage units themselves are made in the same dimensions. Turns out the 11” cubbies were too small to fit the puzzles and some books, but the 13” cubbies were too large to fit in his closet. The closet isn’t deep enough to even get the larger bins out of the unit, resulting in us needing 12” cubbies. *face palm*
Not only did we need the dimension in between the ones readily available, we also wanted to maximize the storage space by having cubby units on both sides of the divider in his closet. Meaning we would need a 2 unit system and a 6 unit system… now we are really getting too specific for what is offered in stores. So what were we to do? Break out our tools and get to building!
I have to admit, we were pretty proud of ourselves with how these turned out! Chris even said he thinks this has been our best work yet in terms of craftsmanship! Precision for the win!
Let’s get to learning how to make these awesome and ridiculously easy closet cubbies!
SUPPLIES
NOTE: Supplies listed below are to make both a 6-CUBE and 2-CUBE Storage Unit.
- (5) 1x12x6 Project Boards
- You could use 3/4″ plywood or MDF. We preferred to use solid wood.
- 1 1/4” Screws
- 1 1/4″ Kreg Screws
- Kreg Pocket Hole Kit
- Right Angle
- Miter Saw (Could use Circular Saw or Table Saw)
- Drill
- Sander + Sand Paper (<< This inexpensive sander gets the job done.)
- Wood Filler
- White Caulk + Caulk Gun
- Caulking Tool/Smoother (<< This tool works like a charm!)
- Primer (<< This one is Greenguard Gold Certified!)
- White Semi-Gloss Paint (<< Our new go-to paint brand!)
- Brush
- (2) Paint Pans
- Stir Sticks
- Tape Measure + Pencil
CUTS
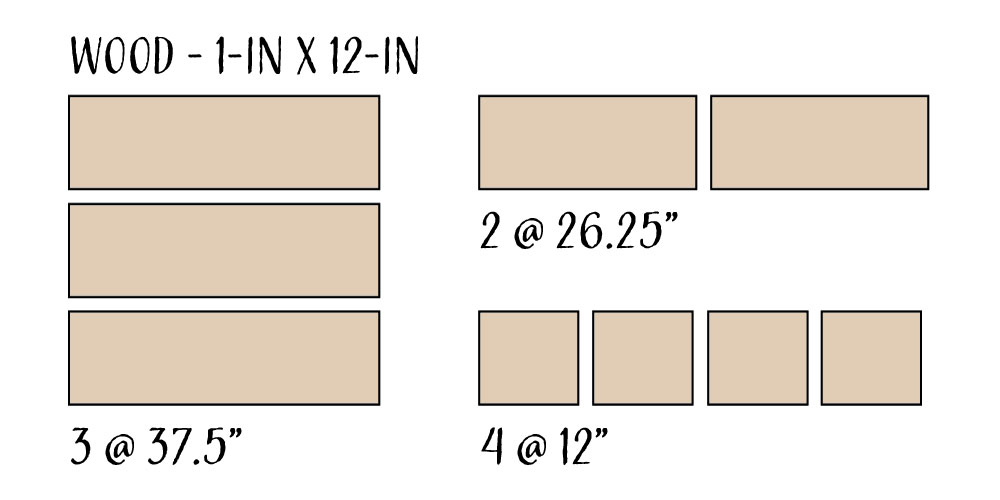
6-CUBE: Using the 1x12s, cut (3) 37.5″ pieces, (2) 26.25” pieces, and (4) 12″ pieces.
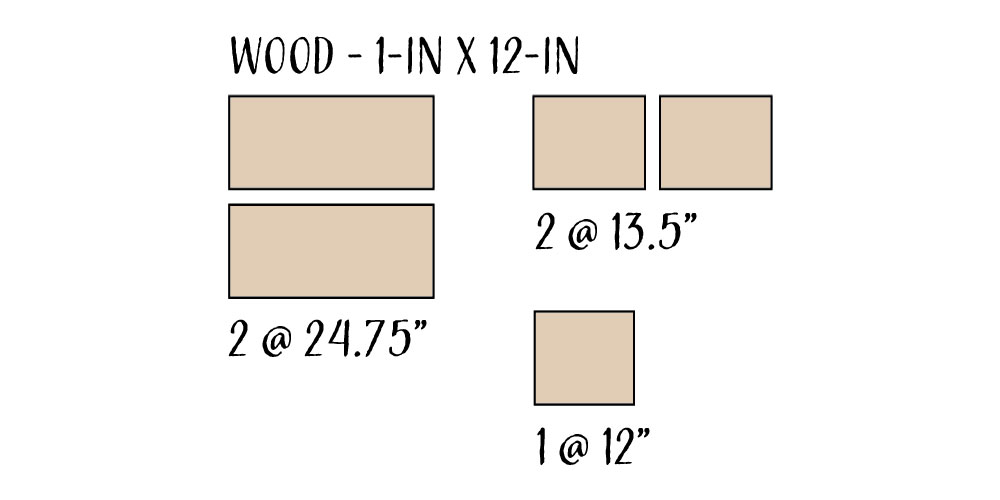
2-CUBE: Using the 1x12s, cut (2) 24.75″ pieces, (2) 13.5” pieces, and (1) 12″ pieces.
ASSEMBLE FRAME
Due to potential variations in cuts or any warping in the wood, we recommend assembling the frame work first before installing the cubby dividers. This way you can play around with placement to determine which dividers fit best in which location.
6-CUBE: Using the (3) 37.5″ pieces and the (2) 26.25″ pieces, use 1.25″ screws to assemble the frame as illustrated below.
2-CUBE: Using the (2) 24.75″ pieces and the (2) 13.5″ pieces, use 1.25″ screws to assemble the frame as illustrated below.
NOTE: Use right angle to ensure 90 degree corners.
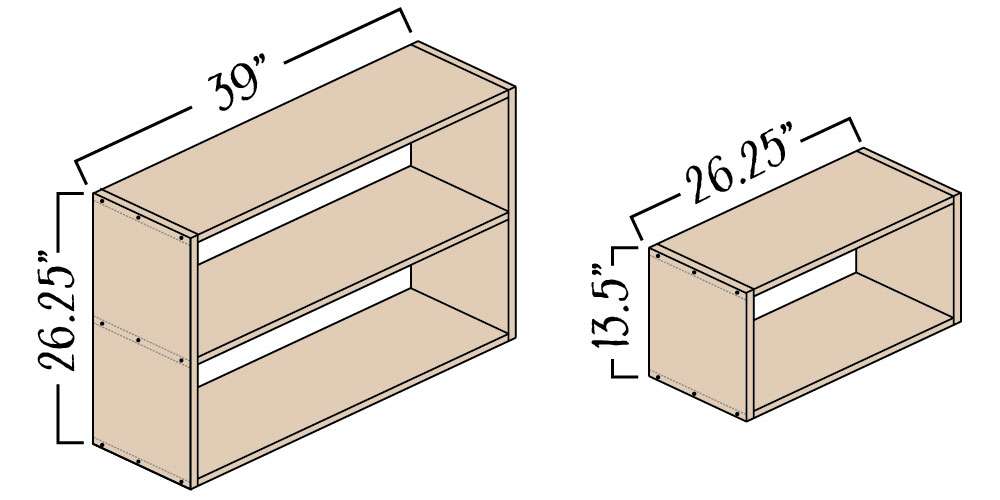
Overall dimensions of the frames shown above.
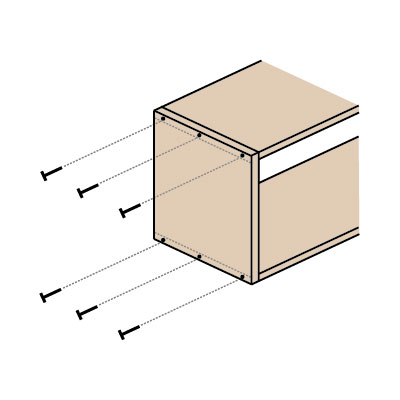
Use (3) 1.25″ screws on both sides of the unit for each horizontal board. The middle screw helps to correct any warping in the long pieces of wood.
POCKET HOLES
In order to minimize the amount of wood filler needed to fill in holes, we decided to go with as few pocket holes as possible.
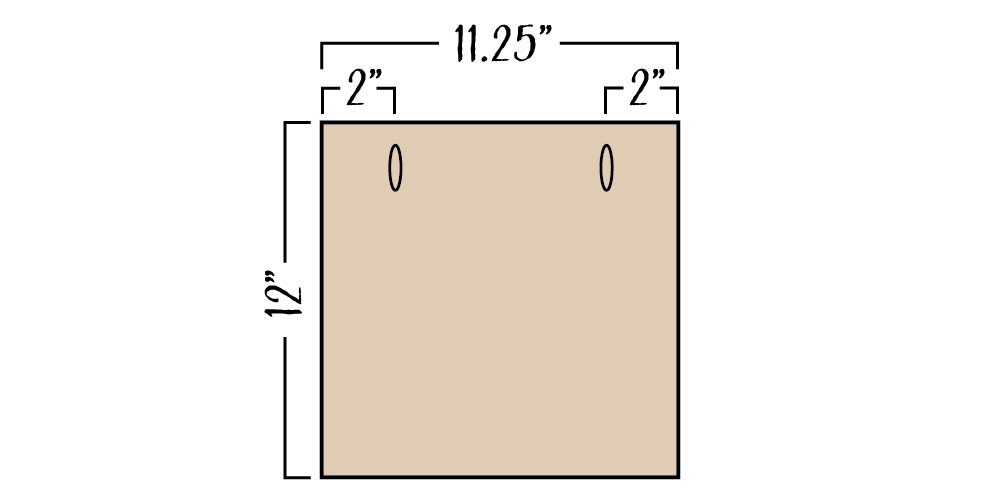
6-CUBE: Set the Kreg Jig for 3/4″ material thickness (1.25″ Kreg screws). Using (2) of the 12″ pieces, drill pocket holes 2″ away from the sides along the top edge.
2-CUBE: No pocket holes are needed on this unit.
ASSEMBLE CUBBIES
6-CUBE: Evenly space all (4) 12″ pieces inside the frame with 12 inches on either side of each divider. At this point in assembly, you may have to swap divider pieces around to determine the best fit based off of cuts and any warping in the wood.
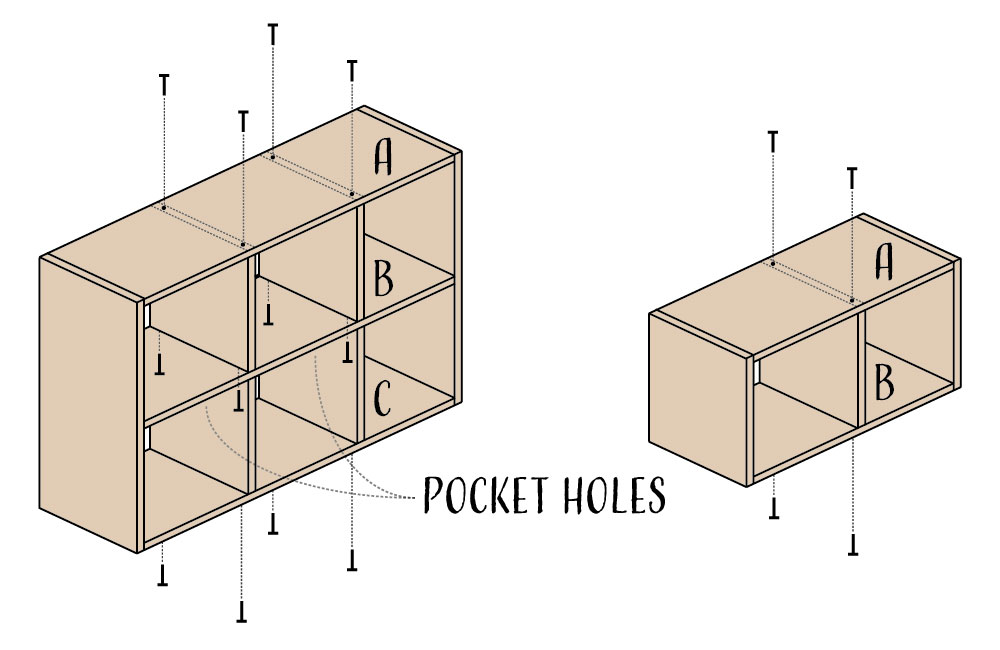
As illustrated below, drill (4) 1.25″ screws through the top of piece A, the underside of piece B, and the underside of piece C. Screws should be placed 1″ from the sides of unit. In the pocket holes, drill (4) 1.25″ Kreg screws into the underside of piece B. The pocket holes are placed 2″ from the sides and therefore the screws will not collide with the screws already inserted at 1″ from the sides.
2-CUBE: Place (1) 12″ piece in the center of the frame with 12 inches on either side. As illustrated below, drill (2) 1.25″ screws through the top of piece A and the underside of piece B. Screws should be placed 1″ from the sides of unit.
NOTE: Use right angle to ensure 90 degree corners.
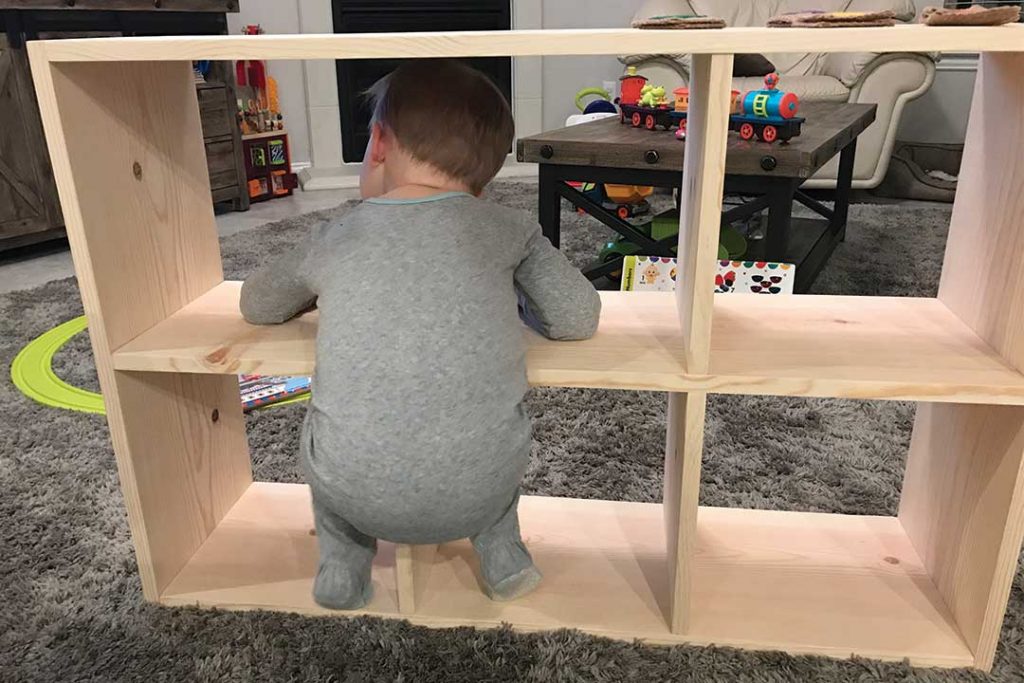
Our son was all too happy to see mommy and daddy making these cubbies for him! Needless to say, he wants to use them as a personal jungle gym rather than a storage unit in his closet.
FILLER + CAULK
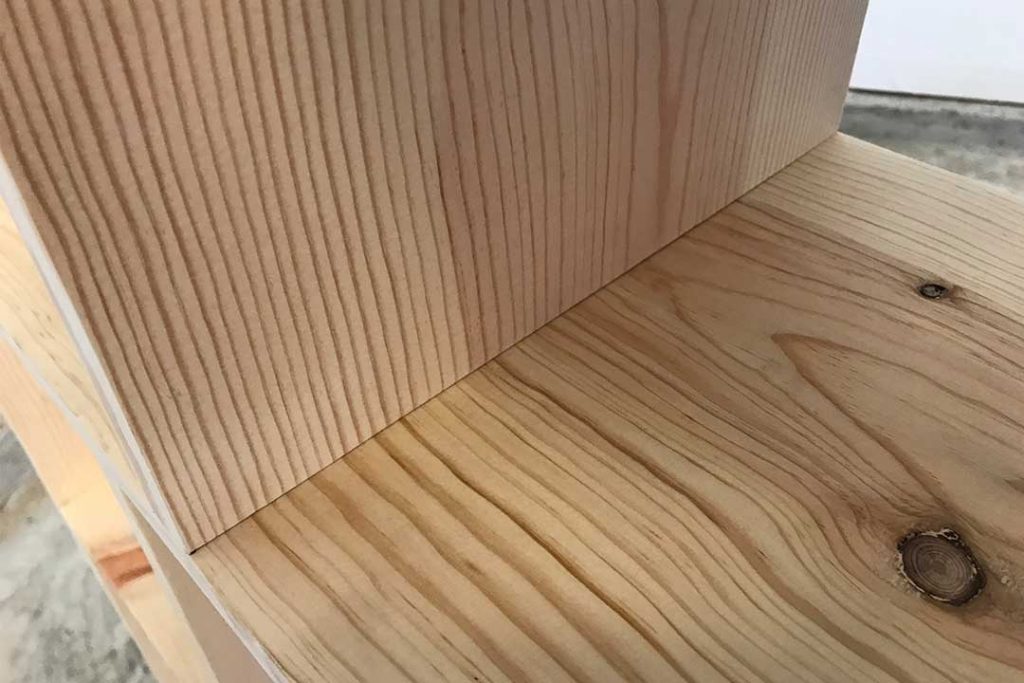
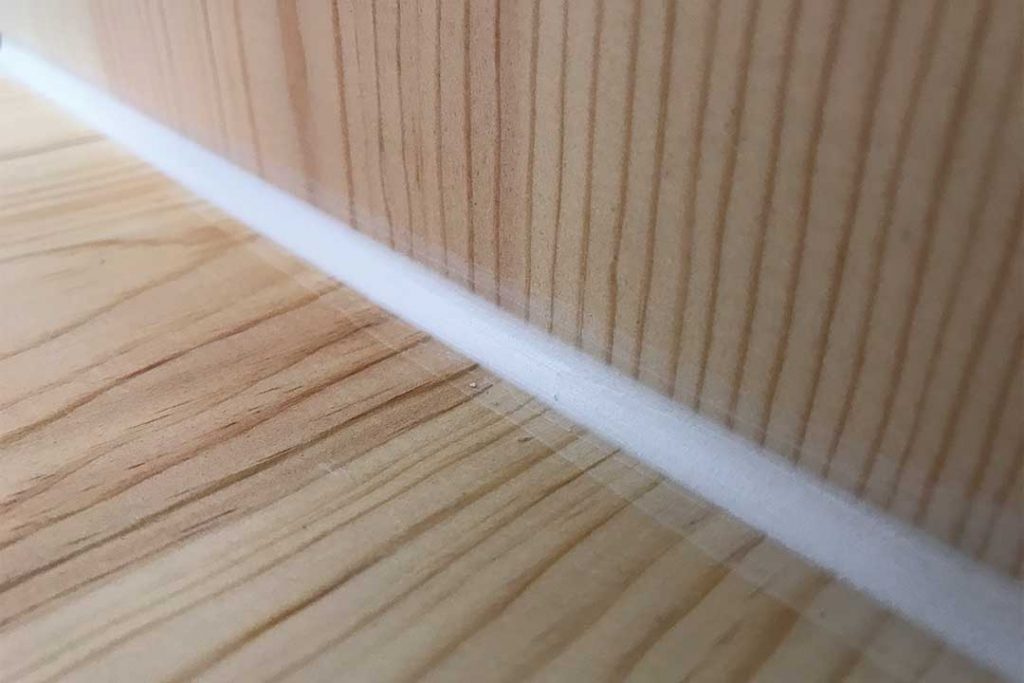
Fill in all screw and pocket holes with wood filler. To hide the location of the screws, we drove all of the screws in just below the wood’s surface and filled with wood filler. Next, caulk all seams and use the caulking tool for a professional finish as shown below.
When we first tried using caulk in our house on base, we just used our finger to smooth the caulk line… let’s just say, it was nothing to brag about. Needless to say, we are not professional caulkers, but we sure feel like pros because this tool made all the difference! Now THIS craftsmanship is something to brag about! Seriously, the caulking tool is so easy to use and the results are amazing!! Plus, we both agree it is fun to use! We highly recommend!
NOTE: Keep in mind that these products can contain VOCs and is recommended to wear a mask/respirator and gloves while working with these products.
Allow adequate drying time for both filler and caulk before moving onto painting.
PRIME + PAINT
Sand down any necessary portions, including areas where wood filler was used, to get smooth surfaces and dust off any sawdust.
TIP: Lay clean scrap 2x4s on top of trash bags or newspaper on the floor. Place the assembled storage units on top of the 2x4s. The 2x4s help to keep the floor covering laying flat while a fan is blowing and preserves the fresh paint on the storage unit. If the project piece sits directly onto the floor covering, newspaper and dried paint drops on trash bags can stick to the bottom of the project piece.
Open and stir the can of primer with a stir stick. We used this primer, but had we found ECOS Paints sooner, we would have used this one! Pour a small amount of primer into the paint pan and start painting. We ended up doing two coats of primer to make sure we had good coverage to seal the wood and prevent the wood knots from staining the paint. Allow for adequate drying time between coats and before you start painting.
TIP: It is recommended to always pour out small amounts of paint into a paint pan as needed, and not to dip directly into the products bucket. This is good practice to ensure shelf life and quality of the leftover product.
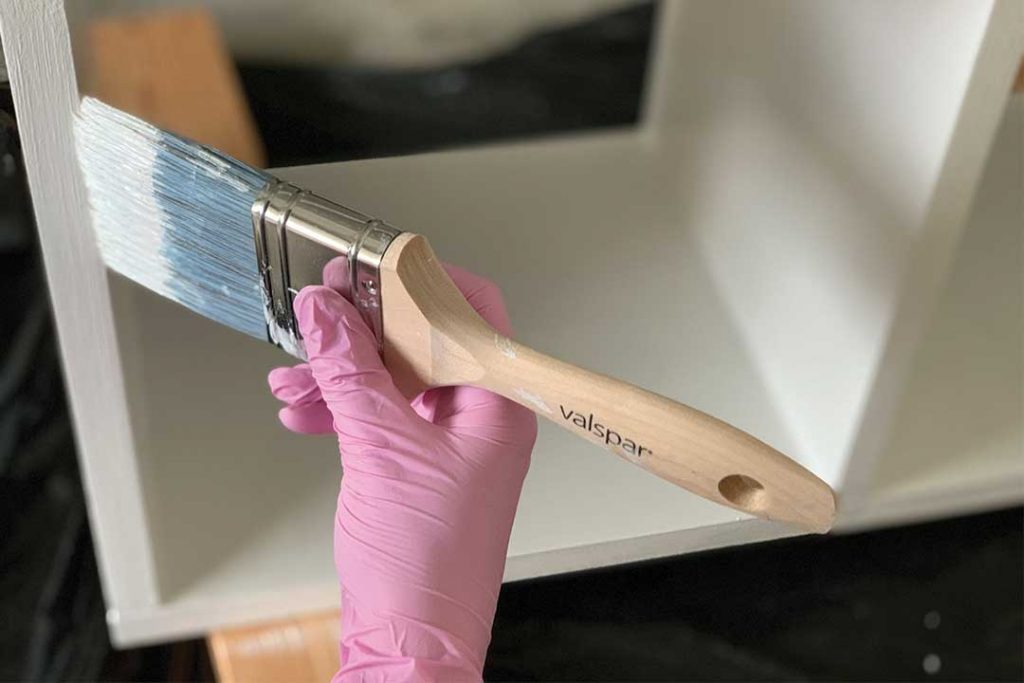
Notice the 2x4s and trash bag configuration below the unit as explained above. This is definitely my new technique when finishing projects!
TIP: Apply thin, consistent layers of primer and paint. Excess paint will result in visible drip lines. Work at a good pace and always clean up the edges or excess paint while applying, as shown above.
Once the primer has fully dried, open and stir the can of paint before pouring a small amount into a new paint pan. Dip the brush into the paint and start painting. We chose to do two coats of paint for a smooth and even finish. Allow for adequate drying time between coats.
Once you have finished, allow the paint to dry completely before placing inside the closet. Refer to your paints instructions on recommended dry times.
We used and love ECOS Lullaby Semi-Gloss Paint! ECOS Paints are non-toxic, zero VOC (including colorants), no odor, and made in the USA! I am extremely sensitive to smells and get horrible migraines with conventional paints. I could hardly notice a smell with ECOS Paints and did not have any issues using their products! That is a miracle considering I can still smell the conventional paint in our new home a year later… I am considering repainting the whole house in ECOS Paints! We will be sharing a post on the benefits of making the switch to ECOS Paints products soon!
We wanted to use the leftover paint for trim touch-up around our house, so we chose to color match the paint with our homes trim – Sherwin Williams Extra White Trim (SW7006).
NOTE: Follow the application and drying instructions on the can. Always work in a well ventilated area when working with primer, paint, stain, or sealant. Recommend using a paint mask/respirator, gloves, and protective eyewear.
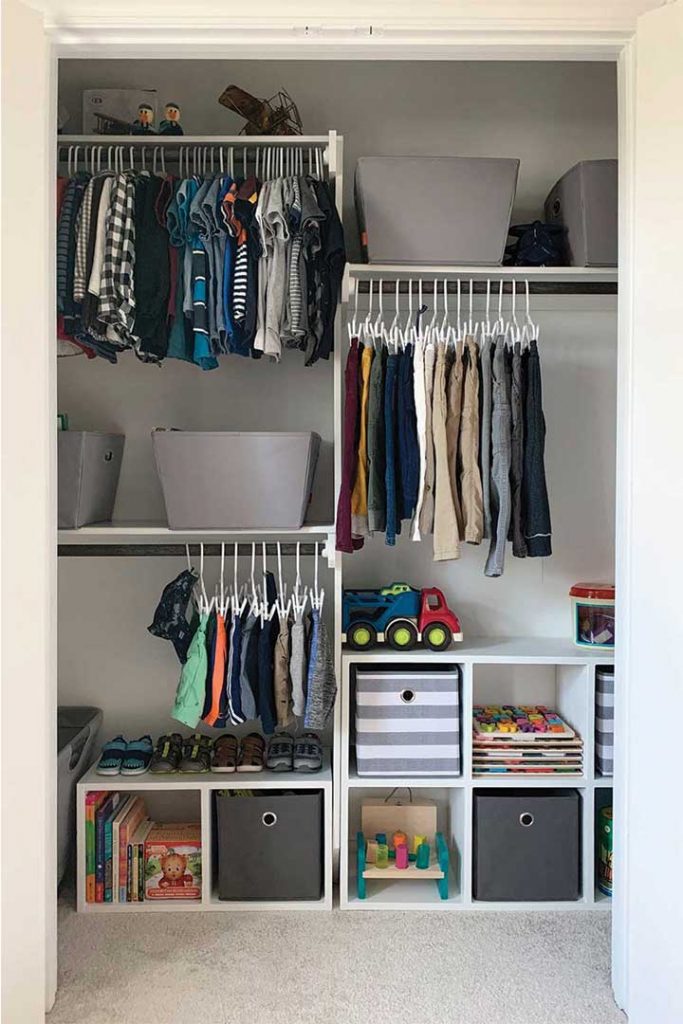
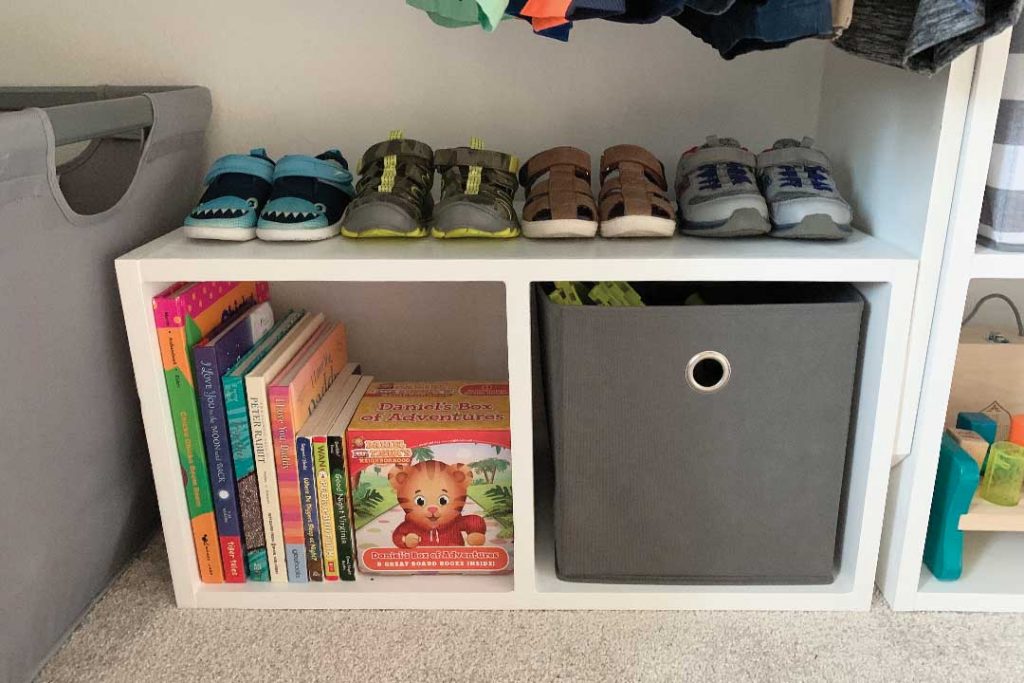
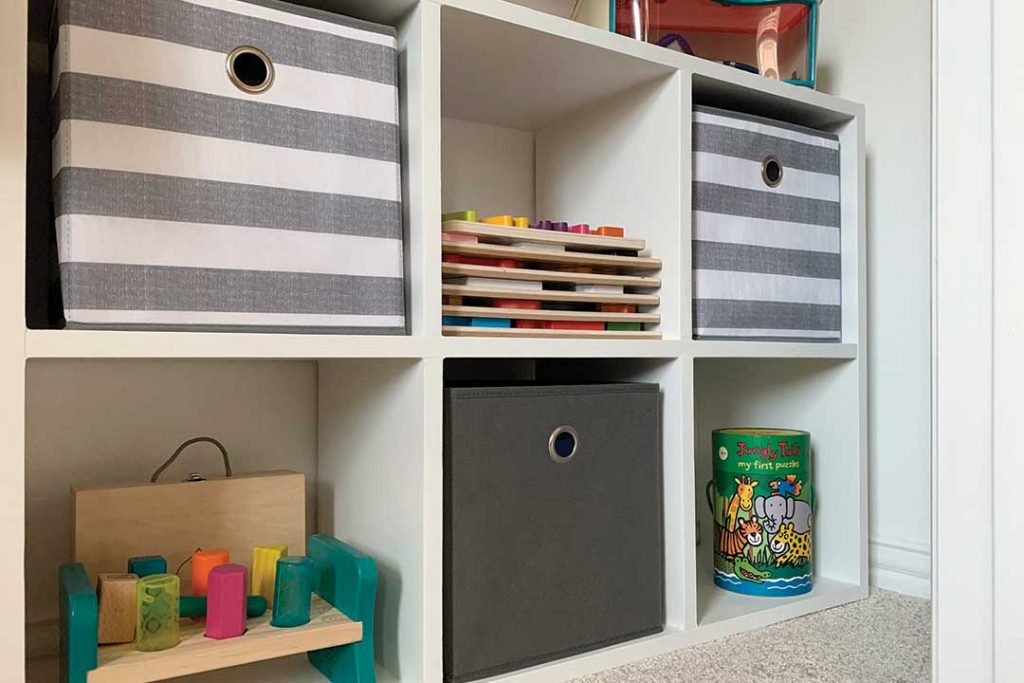
Ah, what a wonderful sight! Want to know how and what products we used to organize the rest of the closet? Check out our entire closet organization here (post coming soon)! Included are links to some of our favorite toys too!
Happy Building!
